|
 |
 |
|
 |
|
|
|
|
|
|
A conceptual map is a technique, strategy or tool to represent, structure, learn, memorize, brainstorm, and organize information in a clear, visual, and meaningful way. It is basically a diagram, scheme or graph that expresses, demonstrates or suggests relationships between different ideas and concepts.
It is a powerful learning tool based on the graphic representation of a specific topic. It promotes collaborative learning, facilitates comprehension by helping to synthesize information, encourages brainstorming, provides clear communication of complex ideas and relationships, sparks creativity and engagement, and helps to identify areas that need further research.
They are a quick, simple, and effective didactic tool. They should be clearly understandable, visually appealing, and rich in information content.
Select a drawing medium or a mind-mapping software. We are going to use FreeMind. It is a premier free mind-mapping software written in Java. It is available on Windows, macOS, and GNU/Linux. Download it, install it, and launch it.
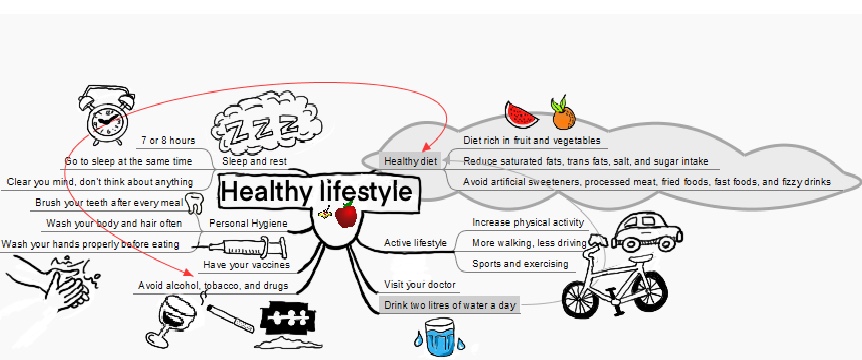
Identify the main topic or the key concept. Click on the File menu, select the New option. Right-click the main node and select Edit Node (F2 is the shortcut), then type the focus question (e.g., Healthy LifeStyle).
Save your conceptual map: File, Save As…, e.g. HealthyLiving.mm.
Identify and write down subordinates concepts, concepts, words, and ideas that relate to the main idea you have previously identified. Add these ideas to a general parking lot and organize them from general to specific.
Let’s create a preliminary concept map by dragging and dropping ideas from the parking lot onto the concept map and linking them together. This process invokes creating a diagram with branches that radiate out from a central node. The radiating branches focus on associated ideas, words, and concepts that relate and build upon the central topic, concept or idea.
To create a child node, click the light bulb icon in the main toolbar. You can also right-click on one of your existing nodes and select New Child Node from the contextual menu. To create a sibling node below, press Enter. To create a sibling node above, press Shift + Enter. To delete a node, just press delete or right-click on the node, then select Remove Node.
Fine-tune your map, continually revise your concept map until you are completely satisfied with it. If you want to edit a node, right-click on it, then select Edit Node (F2) or Edit Long Node (it is used when you want to format the text: italic, bold, font size, color, etc.)
To insert a link, right-click on a node, then select Insert, Hyperlink (File Chooser) -document or local file- or Hyperlink (Text Field) -link to a web page-. To insert an icon, right-click on a node, then select Icons.
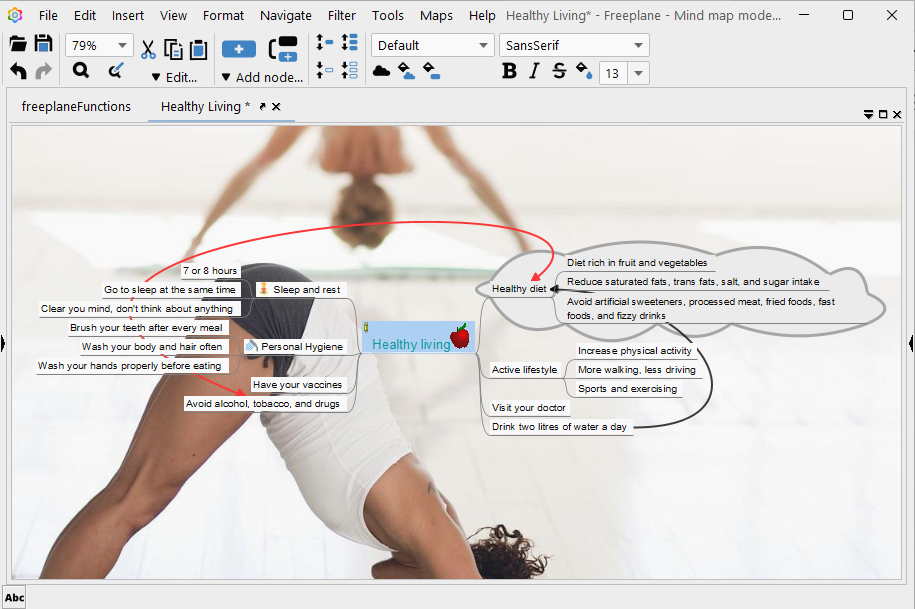
Enhance the visualization power of your concept map by adding images, icons, colors, and pictures, and making your branches curved rather than straight-lined.
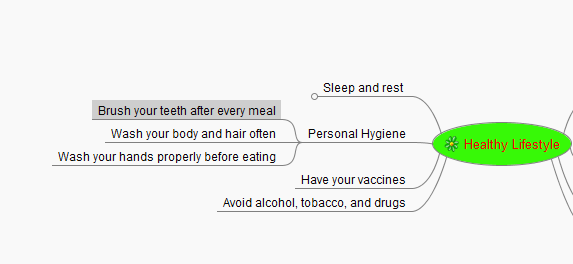
You can collapse or expand your concept map’s branches. When you collapse a particular branch (e.g., Sleep and rest), a small circle will replace it. When you hover over it, a larger circle with a plus indicates that this node can be expanded by just clicking on it. Besides, you can use the menu Navigate, Unfold All/Fold All or Unfold One Level/Fold One Level.
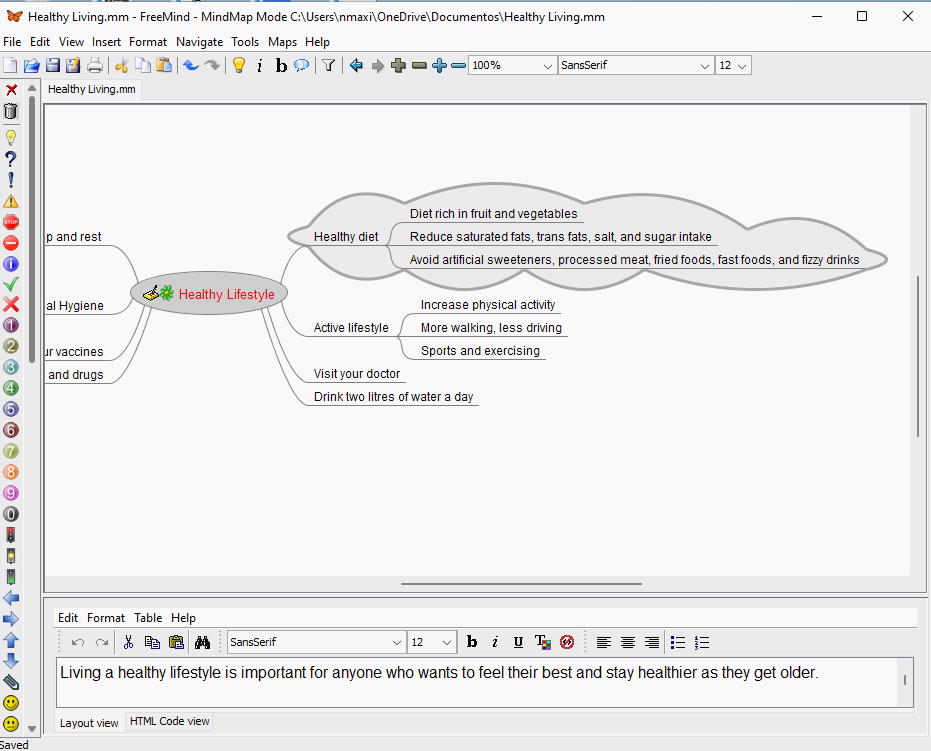
Furthermore, you may want to add notes that describe and give additional information but do not show up on the concept map. The way to add a note is to open the Note window (View, Note Window), select a node, and type the note in the window at the bottom of the screen.
Sometimes, you need to visually identify or highlight a group of nodes, and show their relationship more clearly than with simple graphical links. A node can have a cloud around the node itself and all its descendants. To add a cloud, press Ctrl + Shift + B or in the node’s context menu, select Insert, Cloud.
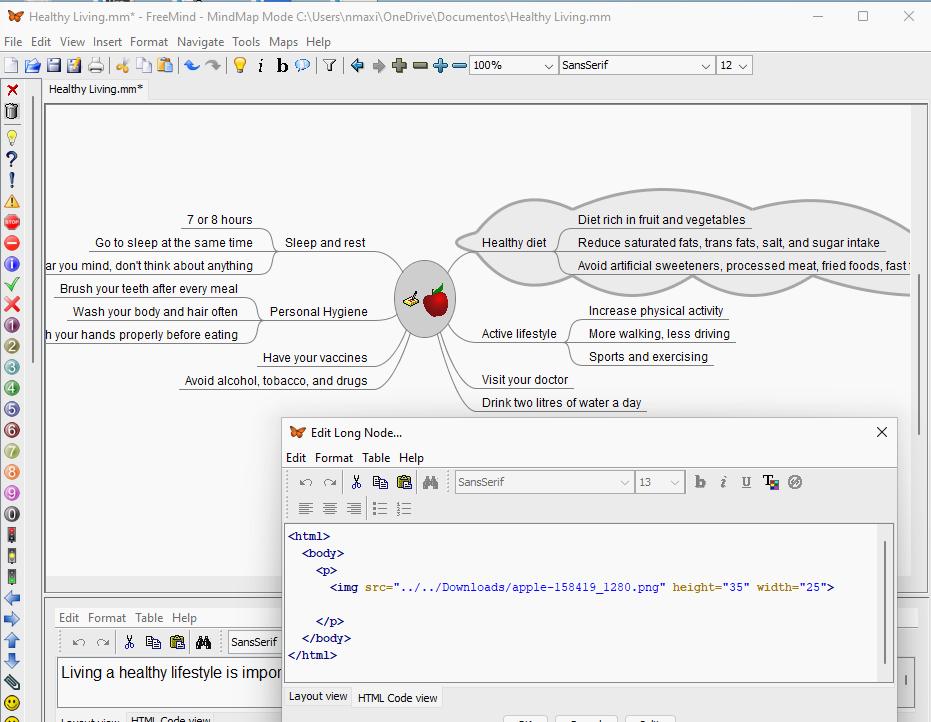
You can insert pictures by highlighting a node and selecting Insert, Image in the context menu. To resize the image just click on the node and select Edit Long Node. A pop-up window will appear, then click on HTML Code view and adjust the HTML code to fit your needs.
Additionally, you can connect or link two nodes by highlighting them, then selecting Insert, Add Graphical link. It is one way to reinforce the relationship between two nodes visually.
Export your concept map. Select File, Export, choose a format (PNG, PDF, JPEG, etc.), a location, and a name.

JustToThePoint Copyright © 2011 - 2024 Anawim. ALL RIGHTS RESERVED. Bilingual e-books, articles, and videos to help your child and your entire family succeed, develop a healthy lifestyle, and have a lot of fun. Social Issues, Join us.
This website uses cookies to improve your navigation experience.
By continuing, you are consenting to our use of cookies, in accordance with our Cookies Policy and Website Terms and Conditions of use.