|
 |
 |
|
 |
|
|
|
|
|
|
A terminal multiplexer is a software application that can be used to split a single terminal into one or more virtual sessions. Basically, we can have multiple sessions inside one single terminal and attach and detach these sessions when required.
It is useful for dealing with multiple command line tools and applications and for separating programs from the Unix shell’s sessions that started them, that’s particularly important when we want a remote process or program to continue running even when the connection is closed or down.
Let’s say you have to administer a remote server via ssh but the connection is poor and unreliable. That is highly annoying because you have to reconnect often and obviously, you don’t want to lose all your job and restart your tasks and processes all over again. Terminal multiplexers offer the possibility of saving your sessions and then disconnect. Once you log on again, you can reattach to your last session and continue just where you have left it.
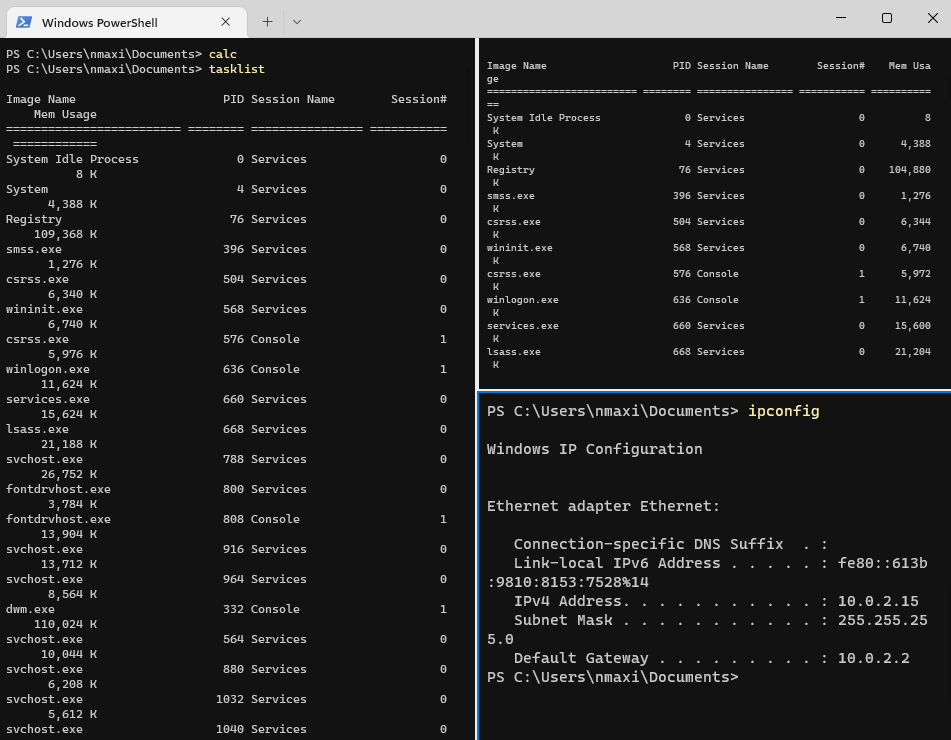
Windows Terminal is the most tmux-like terminal for Windows because it supports multiple tabs and multi-pane view at the terminal-level (splitting the terminal into multiple panes), regardless of shell for better productivity and multitasking.
To open/close a new tab, just click the + button on the tab bar or press Ctrl, Shift and T/W. To move through the tabs, press Ctrl+Tab/Ctrl+Shift+Tab. To split the terminal into two panes, press Alt, Shift, and + (vertically), Alt, Shift, and - (horizontally). To switch between these panes, press Alt + arrow keys.
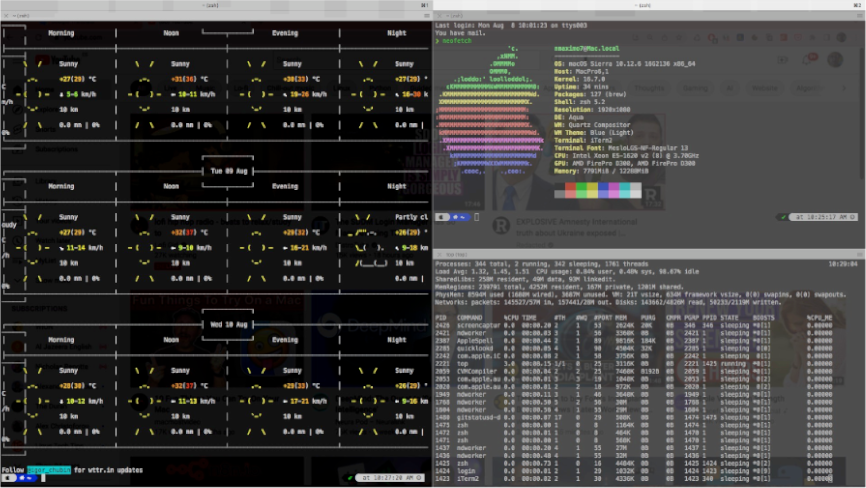
iTerm is also somewhat similar to Tmux. You can create multiple virtual windows inside a single ‘physical’ window and you can split, swap, and resize panes.
When you first start iTerm2, a window opens showing a terminal session. If you want to open more than one session at a time…
… each of which is a separate session.
# remap prefix from 'Ctrl-b' to 'Ctrl-a'
unbind C-b
set-option -g prefix C-a
bind-key C-a send-prefix

# Mouse compatibility
set-option -g mouse on
set -g set-clipboard on

# split panes using Ctrl-h and Ctrl-v
bind h split-window -h
bind v split-window -v
unbind '"'
unbind %

# switch panes using Alt-arrow without prefix
bind -n M-Left select-pane -L
bind -n M-Right select-pane -R
bind -n M-Up select-pane -U
bind -n M-Down select-pane -D

# reload tmux conf with Prefix + r
bind r source ~/.tmux.conf
# command delay? No
set -g escape-time 10
############################################
### DESIGN CHANGES (/u/dothebarbwa)      ###
############################################

# loud or quiet?
set -g visual-activity off
set -g visual-bell off
set -g visual-silence off
setw -g monitor-activity off
set -g bell-action none

#  modes
setw -g clock-mode-colour colour5
setw -g mode-style 'fg=colour1 bg=colour18 bold'

# panes
set -g pane-border-style 'fg=colour19 bg=colour0'
set -g pane-active-border-style 'bg=colour0 fg=colour9'

# statusbar
set -g status-position bottom
set -g status-justify left
set -g status-style 'bg=colour18 fg=colour137 dim'
set -g status-left ''
set -g status-right '#[fg=colour233,bg=colour19] %d/%m #[fg=colour233,bg=colour8] %H:%M:%S '
set -g status-right-length 50
set -g status-left-length 20

setw -g window-status-current-style 'fg=colour1 bg=colour19 bold'
setw -g window-status-current-format ' #I#[fg=colour249]:#[fg=colour255]#W#[fg=colour249]#F '

setw -g window-status-style 'fg=colour9 bg=colour18'
setw -g window-status-format ' #I#[fg=colour237]:#[fg=colour250]#W#[fg=colour244]#F '

setw -g window-status-bell-style 'fg=colour255 bg=colour1 bold'

# messages
set -g message-style 'fg=colour232 bg=colour16 bold'
# /home/$USER/.config/tmuxinator/mySession.yml
name: mySession # Session's name and project
root: ~/

windows: # The windows option allows the specification of any number of tmux windows. We define three windows: first_window, system_info, and entertaining.
  - first_window:
      layout: main-horizontal # You can arrange panes in one of the five preset layouts: even-horizontal, even-vertical, main-horizontal, main-vertical, or tiled.
      panes: # Panes are optional and are children of window entries. We define the panes that get created inside each window.
        - nvim myfile.txt # Under each pane, we can give a command to execute.
        - cal
        - date
  - system_info:
      layout: tiled
      panes:
        - free -h
        - df -h
        - sensors
        - htop
  - entertaining:
      layout: 4a38,192x55,0,0{101x55,0,0,2,90x55,102,0,8} # We use the previous layout.
      panes:
          - is_justtothepoint_alive:
              - ping -c 4 justtothepoint.com : # You can execute many commands in a pane, e.g., ping -c 4 justtothepoint.com, is justtothepoint.com alive?
              - newsboat
          - music:
              - radio

JustToThePoint Copyright © 2011 - 2024 Anawim. ALL RIGHTS RESERVED. Bilingual e-books, articles, and videos to help your child and your entire family succeed, develop a healthy lifestyle, and have a lot of fun. Social Issues, Join us.
This website uses cookies to improve your navigation experience.
By continuing, you are consenting to our use of cookies, in accordance with our Cookies Policy and Website Terms and Conditions of use.