|
 |
 |
|
 |
|
|
|
|
|
|
“To install, drag this icon…” no more! Homebrew Cask’s motto
There was a lot more to magic, as Harry quickly find out, than waving your wand and saying a few funny words, J. K. Rowling, Harry Potter.
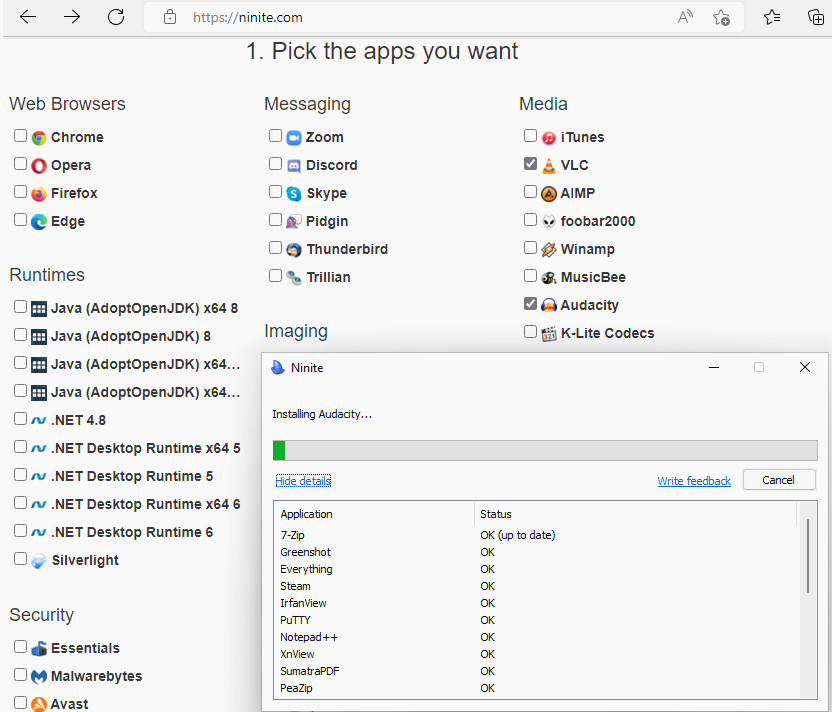
You will typically install software through an installer, a piece of software that installs a program on a computer, but there is more about it than just clicking Next, Next, and Finish.
If you don’t have enough space, then you need to delete some files, directories and/or applications, and free up storage.
If you are running out of space in your main partition (C:), some application installers will allow you to choose a different install location. You could create a Program Files folder on your D drive and install these applications into this folder.
If you can’t install a program:
A package manager is a collection of software tools that automates the process of installing, upgrading, configuring, and removing software. Upgrading is part of the management a package manager provides, so you can update all installed packages with a single command saving you a lot of time.
Credits: Installing software with winget & automating installation with PowerShell by Doug Waldrom, https://dev.to/guitarzan/installing-software-with-winget-automating-installation-with-powershell-1pdf
Use: Start PowerShell as administrator, allow running scripts (Set-ExecutionPolicy -ExecutionPolicy Unrestricted -Scope Process), and run the script (.\InstallSoftware.ps1)
Troubleshooting: Make sure that winget is on the PATH, run it once, and accept the license agreement that pops up.
Write-Output "Installing Apps"
$apps = @(
    @{name = "7zip.7zip" },
    @{name = "Dropbox.Dropbox" },
    @{name = "Google.Chrome" },
    @{name = "Greenshot.Greenshot" },
    @{name = "Inkscape.Inkscape" },
    @{name = "Microsoft.PowerShell" },
    @{name = "Microsoft.PowerToys" },
    @{name = "Microsoft.VisualStudioCode" },
    @{name = "Microsoft.WindowsTerminal" },
    @{name = "Notepad++.Notepad++" },
    @{name = "TimKosse.FileZilla.Client" },
    @{name = "VideoLAN.VLC" },
    @{name = "WinDirStat.WinDirStat" }
);
Foreach ($app in $apps) {
    $listApp = winget list --exact -q $app.name # $listApp saves all applications you have already installed.
    if (![String]::Join("", $listApp).Contains($app.name)) {
      # If the app is not already installed ($listApp does not contain $app.name)
        Write-host "Installing: " $app.name
        winget install -e -h --accept-source-agreements --accept-package-agreements --id $app.name
        # It installs the app, accepts the license agreement and avoid the prompt. -h runs the installer in silent mode, it suppresses all UI. -e uses the exact string in the query.
    }
    else {
        Write-host "Skipping: " $app.name " (already installed)"
    }
}
Set-ExecutionPolicy Bypass -Scope Process -Force; [System.Net.ServicePointManager]::SecurityProtocol = [System.Net.ServicePointManager]::SecurityProtocol -bor 3072; iex ((New-Object System.Net.WebClient).DownloadString('https://community.chocolatey.org/install.ps1'))
  PS C:\Users\nmaxi> choco
  Chocolatey v1.1.0
  Please run 'choco -?' or 'choco  -?' for help menu.
Install Homebrew:
xcode-select --install # Install XCode's Command Line Tools
/bin/bash -c "$(curl -fsSL https://raw.githubusercontent.com/Homebrew/install/HEAD/install.sh)" # Install HomeBrew
You need to add Homebrew’s executable directory to your PATH. If you are using ZSH (macOS Mojave and higher), you need to edit the file ~/.zshrc. Otherwise, you need to edit the file ~/.bash_profile:
export PATH=/usr/local/bin:$PATH
Then, you need to source these changes by reopening your terminal or typing: source ~/.zshrc (ZSH) or source ~/.bash_profile. You can execute the command echo $0 to determine your shell.
Let’s verify that homebrew is set up correctly: brew doctor
List all the packages you’ve installed: brew list
Install packages: brew install htop (resource manager); brew install visual-studio-code, brew install barrier.
Upgrade an existing package (brew upgrade htop) or all programs and packages (brew upgrade)
Remove an existing package: brew uninstall outguess
Homebrew Cask extends Homebrew and brings its elegance, simplicity, and speed to the installation and management of GUI macOS applications:
    brew install --cask \
    alfred \
    caffeine \
    cheatsheet \
    dropbox \
    google-chrome \
    rectangle \
    vlc
sudo softwareupdate -ia && sudo reboot updates your macOS, then reboots.
To install a single package or list of packages, including dependencies: pacman -S package_name1 package_name2 …, e.g., pacman -S barrier
To remove a package and its dependencies which are not required by any other installed package: pacman -Rs package_name
pacman -R package_name, without “s”, leaves all of the package dependencies installed.
System Update, it updates all packages on the system: sudo pacman -Syu, sudo reboot
Reflector is a Python script which can retrieve the latest mirror list from the Arch Linux Mirror Status page. It filters the most up-to-date mirrors, sorts them by speed, and overwrites the file /etc/pacman.d/mirrorlist:
    sudo pacman -S reflector # Install Reflector
    sudo reflector --verbose --country 'Spain' --latest 5 --sort rate --save /etc/pacman.d/mirrorlist
Search for a package: pacman -Ss package_name, e.g., pacman -Ss archey
If you are looking for a package that already exists in your system: pacman -Qs package_name, e.g., pacman -Qs nautilus
Cleaning the package cache: sudo paccache -r.
sudo pacman -S pacman-contrib # Automatically cleaning the package cache sudo systemctl enable paccache.timer
Configuring PacMan: sudo vim /etc/pacman.conf
  Color # It adds color to the Pacman Package Manager
  ILoveCandy # Pac-Man loves candy
  [multilib]
  include = /etc/pacman.d/mirrorlist # Uncomment the multilib repository to run 32-bit application on your 64-bit systems.
Troubleshooting, update your keyring: pacman -Sy archlinux-keyring && pacman -Su
git clone https://aur.archlinux.org/yay.git
sudo pacman -S --needed base-devel # These packages are needed for building packages from source.
git clone https://aur.archlinux.org/paru.git # Let's clone Paru repository.
cd paru
makepkg -si # Finally, we build and install Paru
paru -S sddm-sugar-dark
paru -S sddm-theme-sugar-candy-git
paru -S archlinux-tweak-tool-git
user@pc:~$ sudo pacman -Syyu
:: Synchronizing package databases...
:: Starting full system upgrade...
:: Replace wxgtk-common with extra/wxwidgets-common? [Y/n] n
:: Replace wxgtk3 with extra/wxwidgets-gtk3? [Y/n] y
resolving dependencies...
looking for conflicting packages...
:: wxwidgets-gtk3 and wxgtk3 are in conflict. Remove wxgtk3? [y/N] y
error: unresolvable package conflicts detected
error: failed to prepare transaction (conflicting dependencies)
:: wxwidgets-gtk3 and wxgtk3 are in conflict
Widgets 3.2 provides a Qt frontend in addition to the GTK3 one, so packages have been renamed from wxgtk- to wxwidgets-. The GTK2 frontend is no longer provided. If you have wxgtk2 installed, the upgrade will fail with: error: failed to prepare transaction (could not satisfy dependencies) :: removing wxgtk-common breaks dependency ‘wxgtk-common’ required by wxgtk2
Solution: sudo pacman -Rcns wxgtk2 It removes wxgtk2 and all its dependencies, then you should update the system.
pipx is a tool to help you install and run end-user applications written in Python. pipx is made specifically for application installation, as it adds isolation yet still makes the apps available in your shell: pipx creates an isolated environment for each application and its associated packages.
    sudo pacman -S python-pipx # Install pipx (Arch)
    pipx install package_name # installing Python packages as CLI tools
    pipx run pycowsay Moo! # Run applications with pyth
    pipx upgrade package_name # Upgrade a package
    pipx uninstall package_name # Uninstall a package
This is the key to remember, pipx run downloads and runs Python apps in a one-time, temporary environment, leaving your system untouched afterwards. This can be handy when you need to run the latest version of an app, but don’t necessarily want it installed on your computer.

JustToThePoint Copyright © 2011 - 2024 Anawim. ALL RIGHTS RESERVED. Bilingual e-books, articles, and videos to help your child and your entire family succeed, develop a healthy lifestyle, and have a lot of fun. Social Issues, Join us.
This website uses cookies to improve your navigation experience.
By continuing, you are consenting to our use of cookies, in accordance with our Cookies Policy and Website Terms and Conditions of use.