|
 |
 |
|
 |
|
|
|
|
|
|
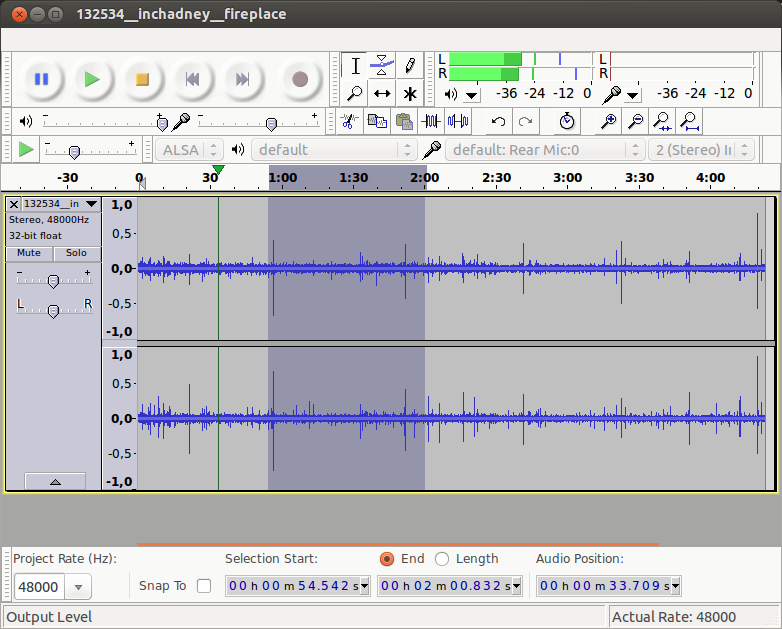
It has many features. You can use it to: record live audio; digitize your old audiotapes, CDs, and vinyl records; cut, copy, splice, or mix sounds together, as well as, applying many filters, such as, changing the speed or pitch, adding echo or removing noise from a recording.
GarageBand is one of the best free software for music creation. It is a fully equipped music creation studio inside your Mac — with a complete sound library that includes instruments, presets for guitar and voice, and an incredible selection of session drummers and percussionists.
It’s easy to learn, play, record, create and share your hits worldwide. You can use your instruments or you can create your own music using the virtual instruments and effects included within GarageBand.
Cakewalk is a complete music production package, with creative songwriting tools and instruments, audio editing, advanced mixing (“achieve pristine pro-studio sounds and create big, clear, dynamic mixes with advanced mixing tools”) and mastering tools (“polish your finished mixes to perfection with built-in mastering tools”).
Others: LMMS is a cross-platform open-source music creator or, more technically, a DAW (Digital audio workstation, an application software used for recording, editing and producing audio files). SoundBridge: Digital Audio Workstation, “We built a DAW for musicians with easy access to all essential tracking, sequencing, editing and mixing features.” Mix is a free and open source DJ software for Windows, macOS, and Linux.
Solfege “is an ear training program written to help you train intervals, chords, scales, and rhythms.” It is free music education software and part of the GNU Project.
Rosegarden is a music composition and editing environment based around a MIDI sequencer that features a rich understanding of music notation and includes basic support for digital audio.

JustToThePoint Copyright © 2011 - 2024 Anawim. ALL RIGHTS RESERVED. Bilingual e-books, articles, and videos to help your child and your entire family succeed, develop a healthy lifestyle, and have a lot of fun. Social Issues, Join us.
This website uses cookies to improve your navigation experience.
By continuing, you are consenting to our use of cookies, in accordance with our Cookies Policy and Website Terms and Conditions of use.