|
 |
 |
|
 |
|
|
|
|
|
|
You must not let anyone define your limits because of where you come from. Your only limit is your soul, Gusteau, Ratatouille.
We live in a visual world where people are less interested in reading and more likely to view something that feeds the eyes and excites the imagination. Videos and animations are the most efficient and attractive ways for any learning process, marketing strategy or any other kind of communication because they are highly engaging and entertaining. They both easily grab the attention of the audience. Animation is the visual art of bringing life to inanimate objects, illustrated or 3D generated characters.
Mixamo is a free online service that has a vast collection of characters, animations, and tools for easily rigging and animating 3D characters. Unity is one of the best platform for creating videogames.
Download and install Unity, launch it, and create a new project by clicking the Create project button, then 3D (Core), give it a name (e.g., MyFirstProject), and press the Create project button again. 
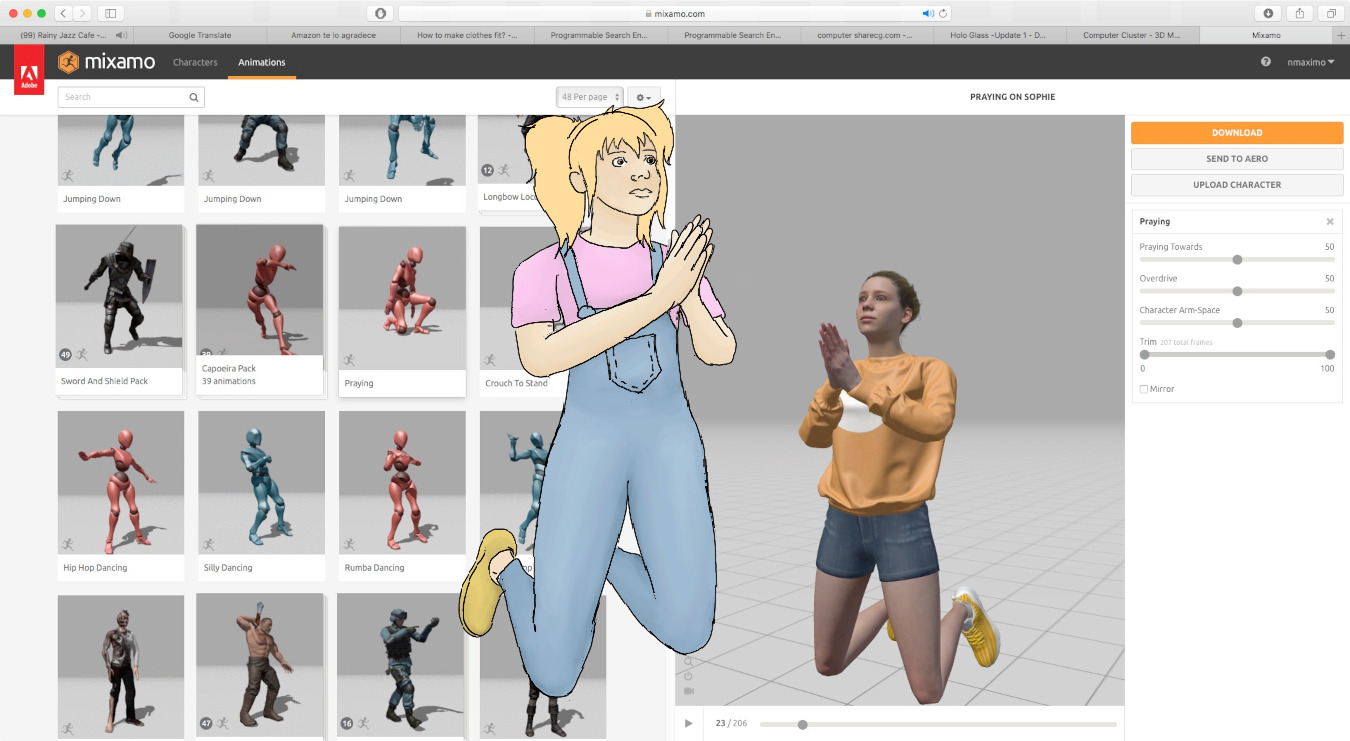
Once you are logged in to the Mixamo webpage, pick a character that you like, e.g., Sophie, and click the Download button. Select in the Format dropdown menu, the FBX for Unity (fbx) option, and in Pose, T-pose. I am going to rename the downloaded file as Sophie.fbx.
Switch to the Animation section and select some animations, e.g, Idle, Walking, Running, or Hip Hop Dancing, and for each of these animations click the Download button and select the following export options: Format (FBX for Unity), Skin (Without Skin -it means that we don’t want to download the model again, just the animation), Frames per Second (30 is OK).
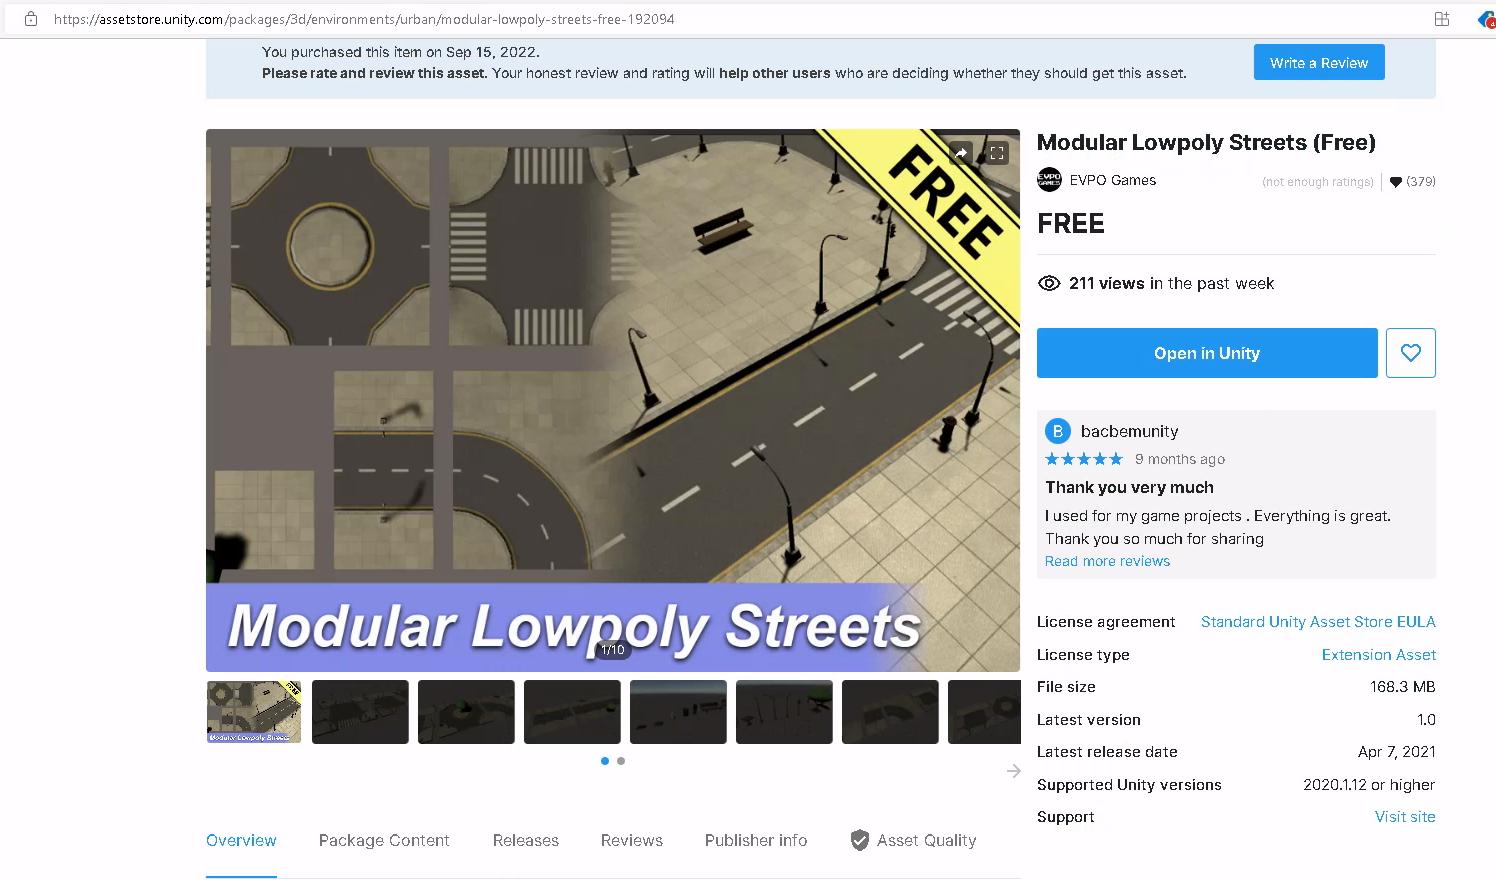
Importing some assets. Log in to the Unity Asset Store website. Search for Modular Lowpoly Streets (Free), click on the Add to My Assets button, then Open in Unity, finally a pop up window will ask if you want to Open Unity Editor, tick on the Always allow assetstore.unity.com to open links of this type in the associated app checkbox, and smash the Open Unity Editor button. It will open the asset inside the Unity editor.
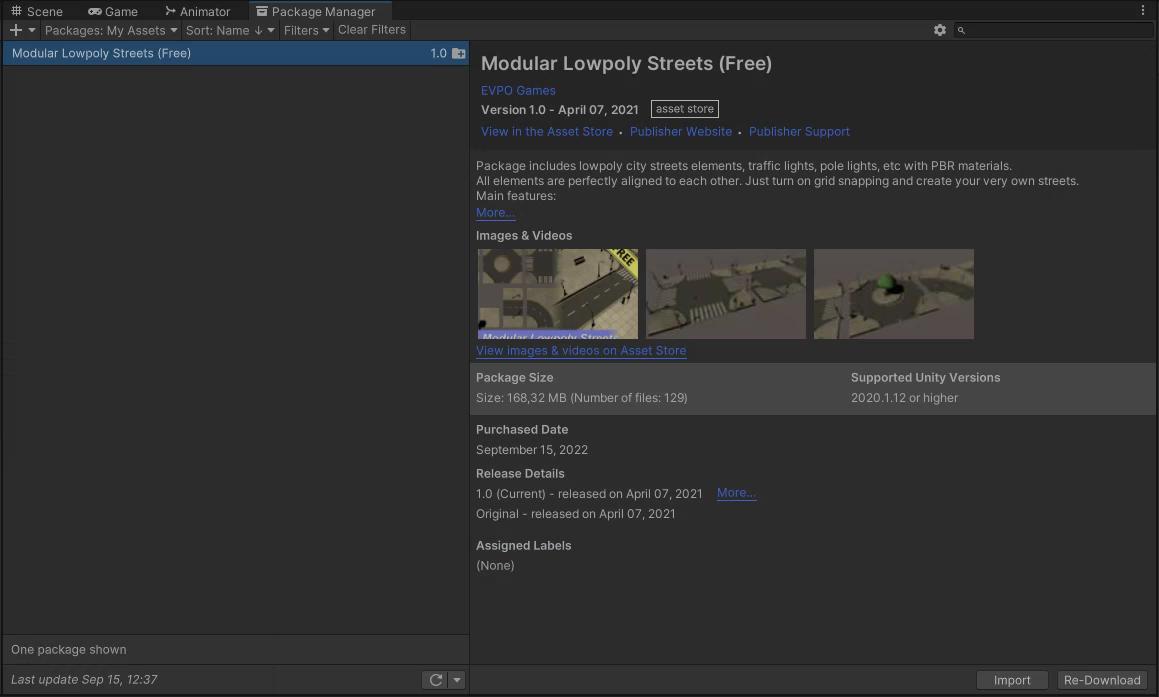
The package manager (Windows, Package Manager) displays which packages are available for installation or are already installed in your project, so just click Download to download this asset, then Import. Next, a dialog box would appear (Import Unity Package), click All, then Import, and the Import Unity Package window will automatically close when the process is finished.
The Hierarchy is where you need to place and organize all your GameObjects such as cameras, lights, and characters in the game’s active scene. The Project windows is where you will find all the assets and files available for the project.
Let’s import Mixamo’s model and animations in our Unity project by dragging them in the “Assets” folder.
Let’s drag our Sophie model into the Scene, double click on it to zoom in. Next, we need to configure some settings. Go to the Inspector, switch to the Rig tab, and select in the Animation Type dropdown, the Humanoid option, and in the Avatar Definition dropdown, the Create From This Model option. Finally, press the Apply button.

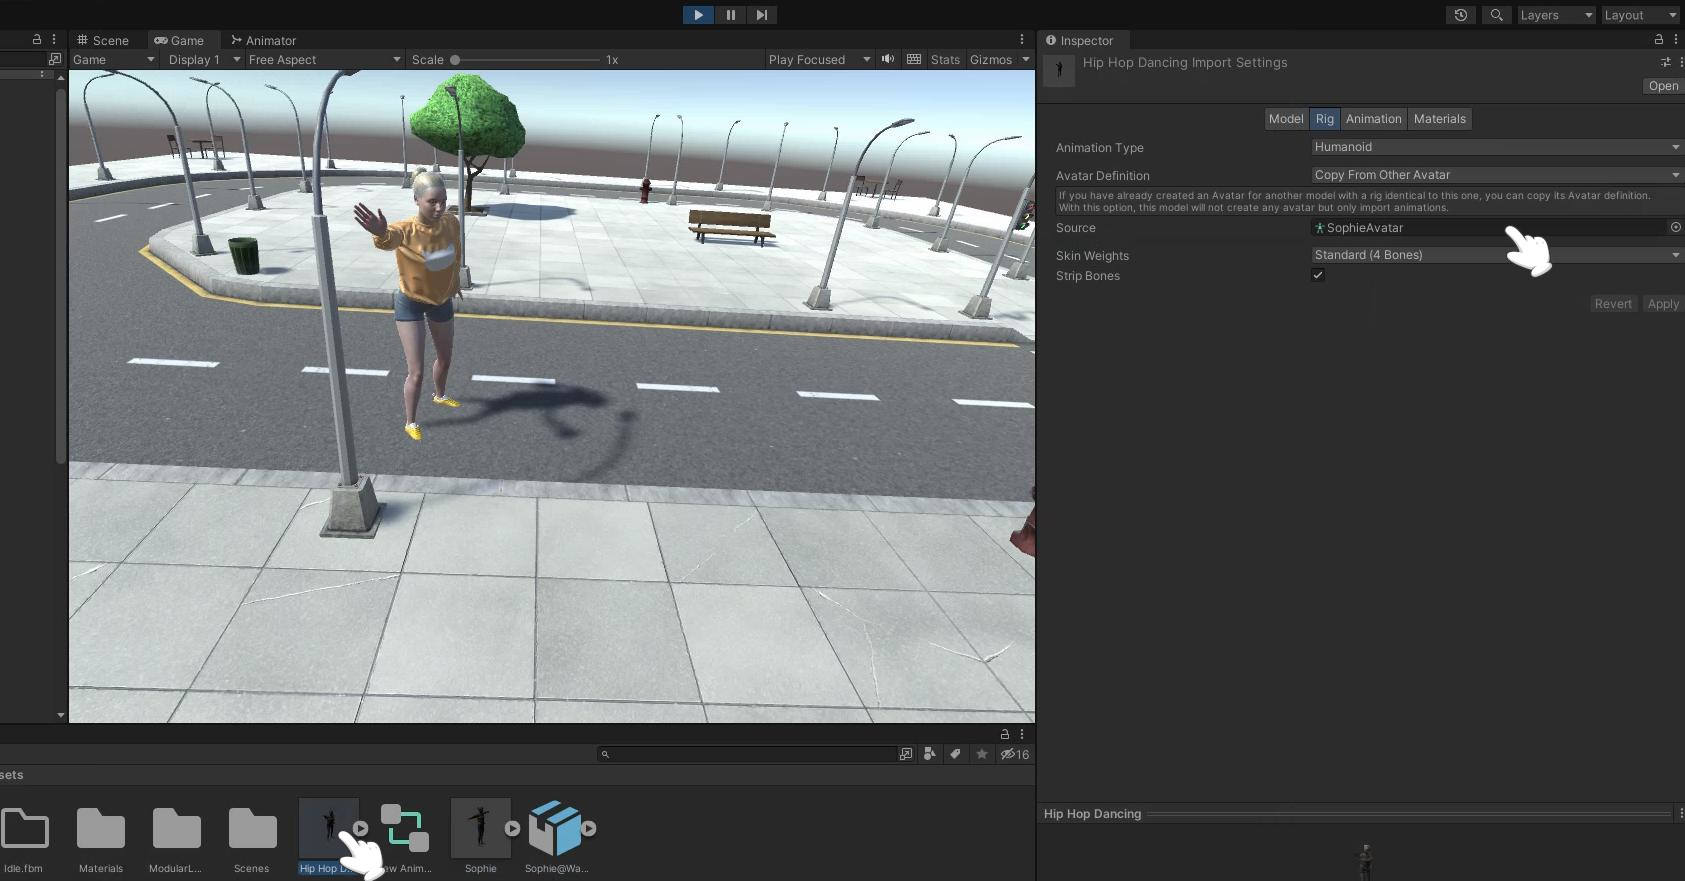
Click on the Hip Hop Dancing animation, go to the Inspector, switch to the Rig tab, and select in the Animation Type dropdown, the Humanoid option; in the Avatar Definition dropdown, the Copy From Other Avatar option, and in the Source dropdown, the SophieAvatar (we are going to reuse Sophie’s model avatar), then click Apply. After that, switch to the Animation tab, and check Loop Time (if Loop Time is enabled, then the animation loops forever). Finally, smash the Apply button. We will repeat the process with our walking animation.
Let’s create an Animator Controller, that is, a Unity asset that controls the logic of an animated GameObject. It lets you arrange and link various animations together using a state machine.Right click on the assets section, Create, Animator Controller and let’s rename it as SophieController.
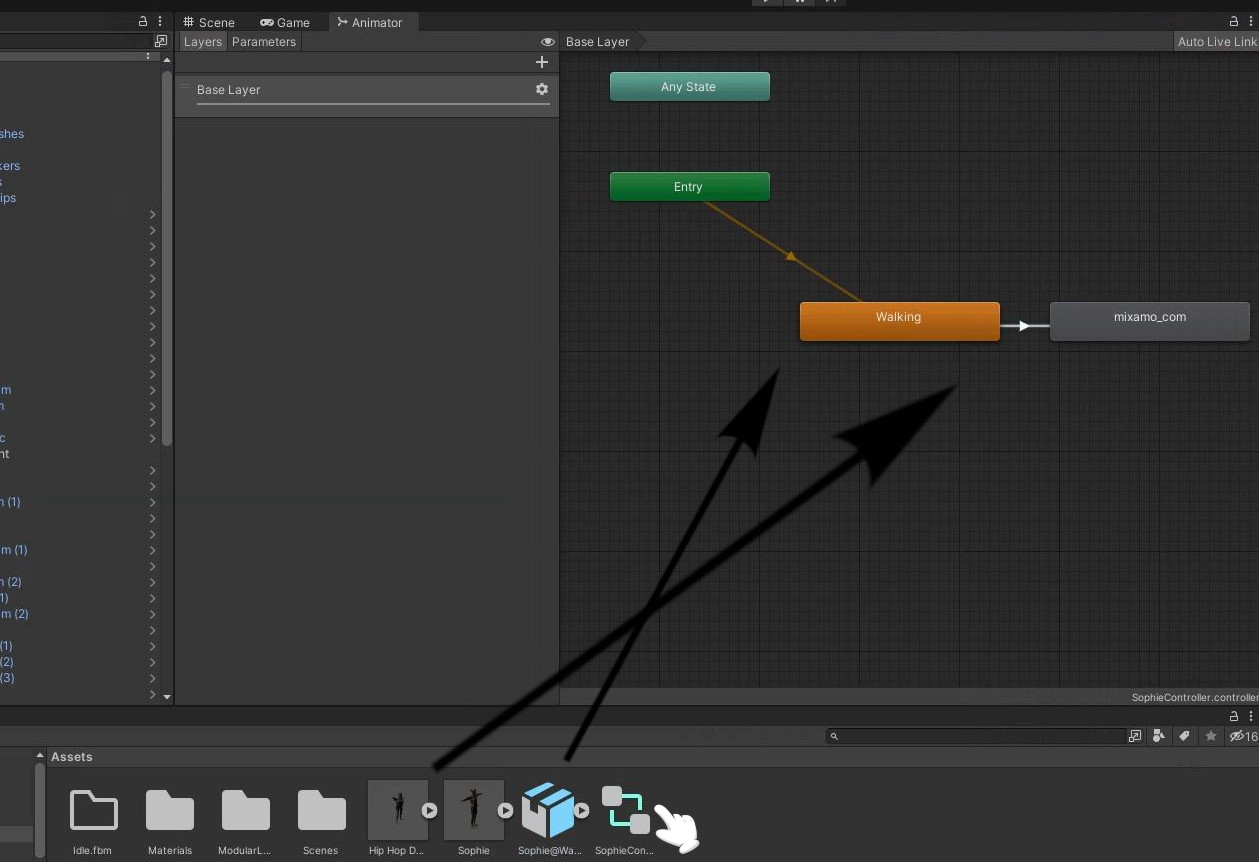
Double click on SophieController. Drag and drop first the Walking animation and then the Hip Hop Dance animation to the Animator Controller, because we want Sophie to walk, then dance immediately afterwards.
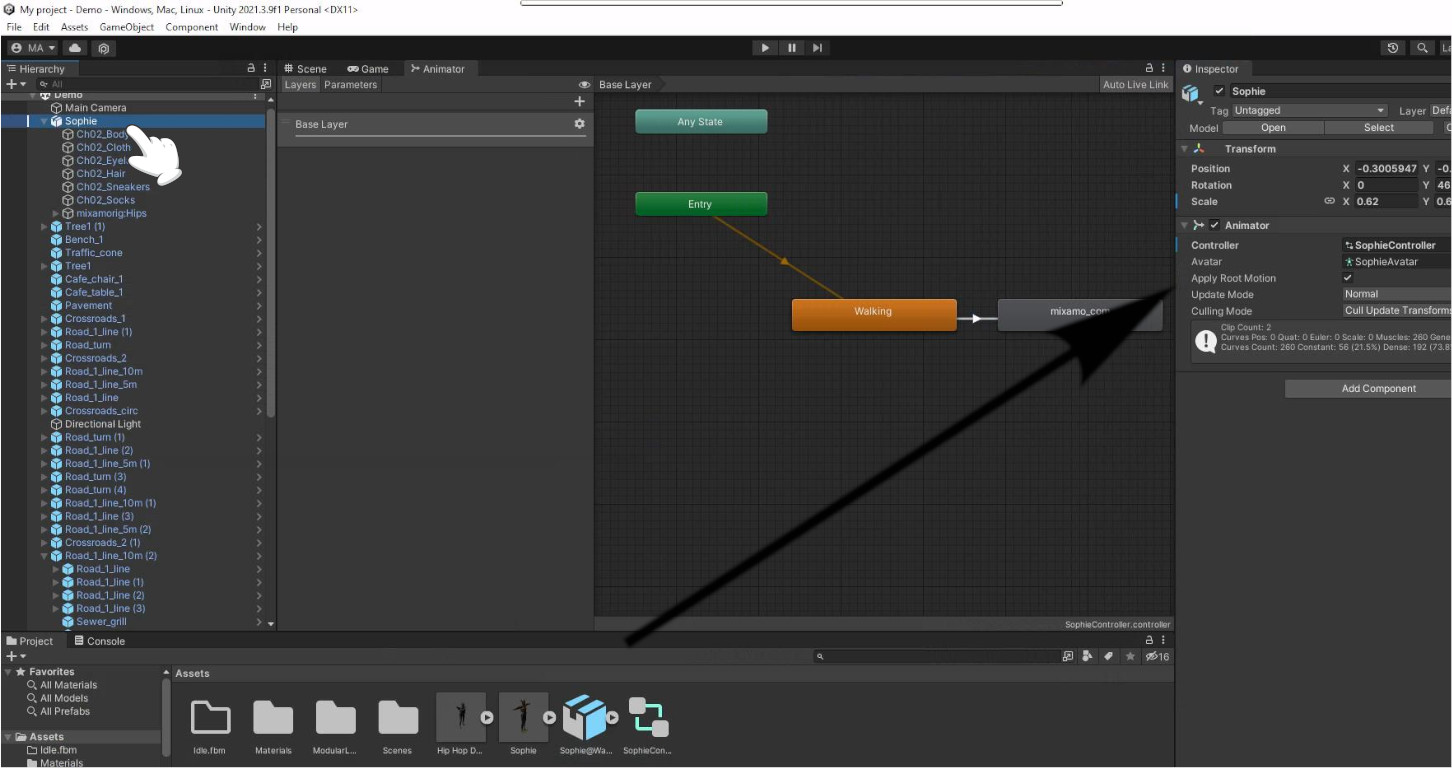
Let’s go back to our 3D model, select Sophie on the top left Hierarchy, and then drag and drop our recently created Animator Controller, SophieController, in the Inspector, more specifically in the Animator section, in the Controller box.
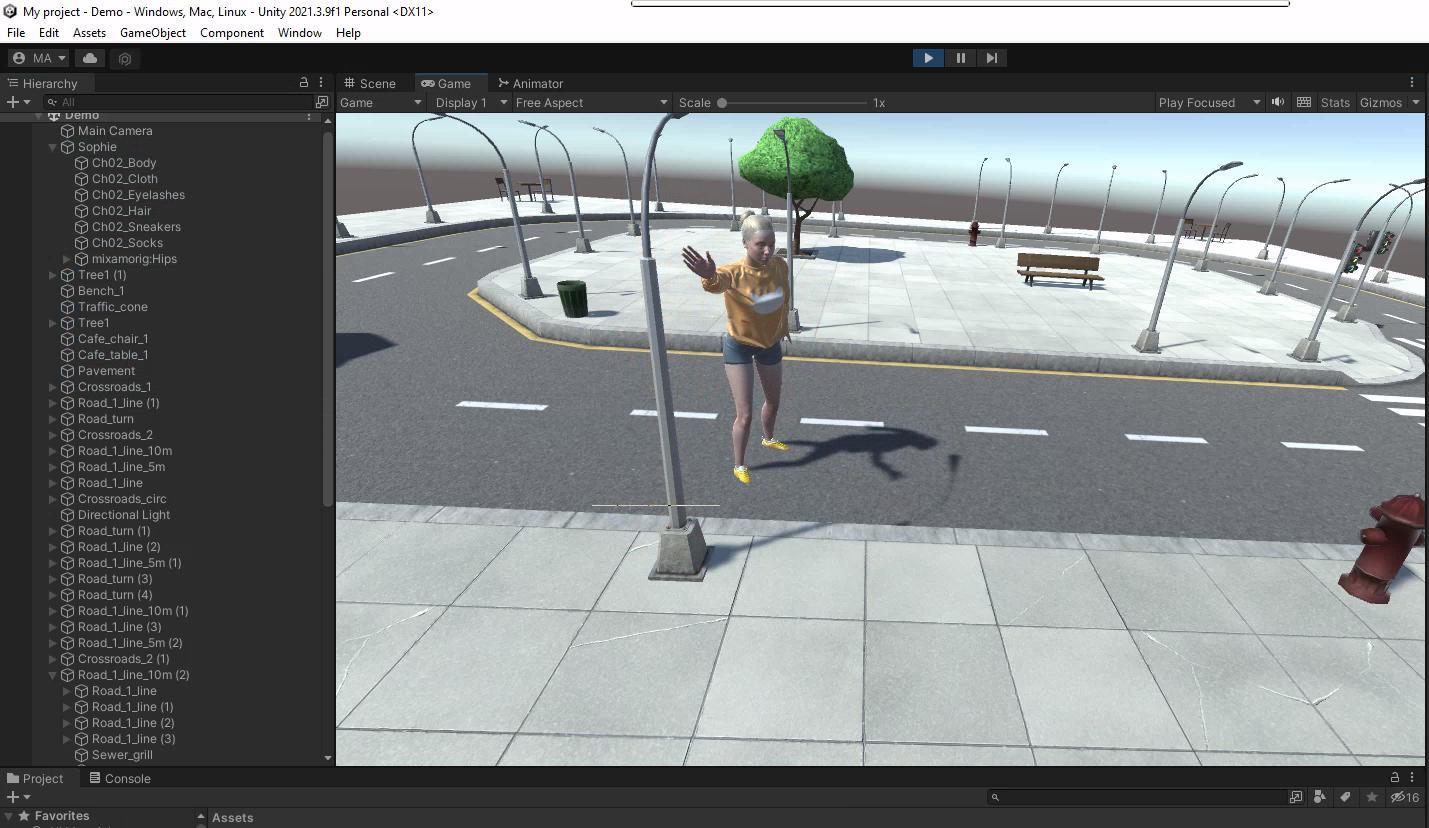
Finally, go to the Scene view, select the Main Camera (select in the Game Object, the option Align with View to adjust the main camera’s position); then, go to Game, and click on play to see the animation.
using UnityEngine;

[RequireComponent(typeof(Animator))]
[RequireComponent(typeof(Rigidbody))]
public class PlayerController : MonoBehaviour
{
    private Animator _animator;
    private Rigidbody _rigidbody;
}
using UnityEngine;
[RequireComponent(typeof(Animator))]
[RequireComponent(typeof(Rigidbody))]
public class PlayerScript : MonoBehaviour
{
    private Animator _animator;
    private Rigidbody _rigidbody;
    private float _horizontalInput;
    private float _verticalInput;
    private static float _SPEED = 0.3f;
    private bool _IsWalking;
    public float thrust = 1.0f;

    // Start is called before the first frame update
    void Start()
    {
        _animator = GetComponent<Animator>();
        _rigidbody = GetComponent<Rigidbody>();
	_IsWalking = false;
    }

    // Update is called once per frame
    void Update()
    {
	_horizontalInput = Input.GetAxis("Horizontal");
        _verticalInput = Input.GetAxis("Vertical");
	if ( Input.GetButtonDown("Jump")  )
Input.GetAxis(“Horizontal”) return the value of the virtual axis identified as Horizontal. It will be in the range -1 (the left arrow key or “a” is pressed).. 0 (no key is pressed).. 1 (the right arrow key or “d” is pressed).
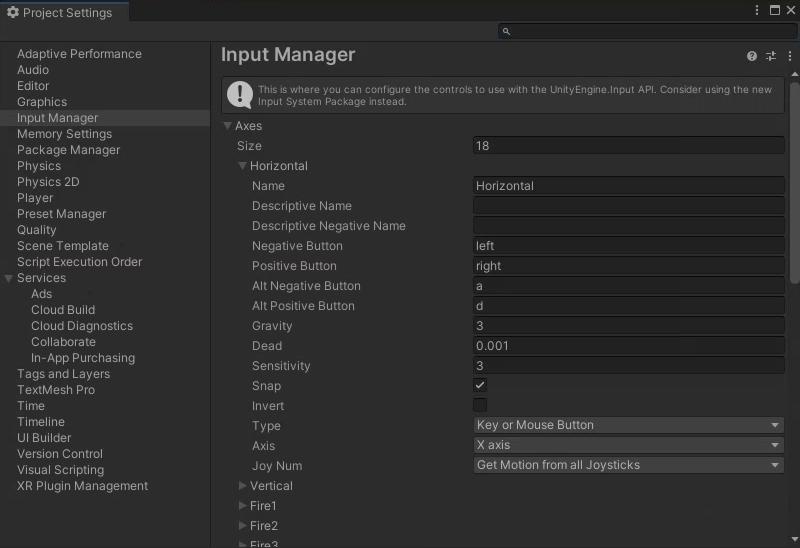
Input.GetButtonDown(“Jump”) returns True when the button Jump is held down, by default the button Jump is the space bar.
The Input manager windows (Edit, Project Settings, Input Manager) is where you can configure the controls to use with the UnityEngine.Input.
{
_animator.SetTrigger("Jump");
// It sets an animation trigger and cause a change in flow in the state machine of our Animator Controller, from Walking to Jumping. A trigger gets consumed (turned to false) immediately after it is used.
_rigidbody.AddForce(0, 0, thrust, ForceMode.Impulse); // It applies an impulse force along the Z axis to the GameObject's Rigidbody.
}
else if (Mathf.Abs(_horizontalInput) > 0.001f)
// If horizontalInput is not null (with some small threshold for some approximation errors with floats)...
{
//... we need to move Sophie. First, we create a rotation to look either left or right depending on the User's input (_horizontalInput);
transform.rotation = Quaternion.LookRotation(new Vector3(-_horizontalInput, 0f, 0f));
// Then, we move forward the GameObject while also considering its rotation using transform.forward (d=d0+v*t+1/2*a*t^2 and a=0)
_rigidbody.MovePosition(_rigidbody.position - transform.forward * _SPEED * Time.fixedDeltaTime);
if (!_IsWalking )
{
_IsWalking = true;
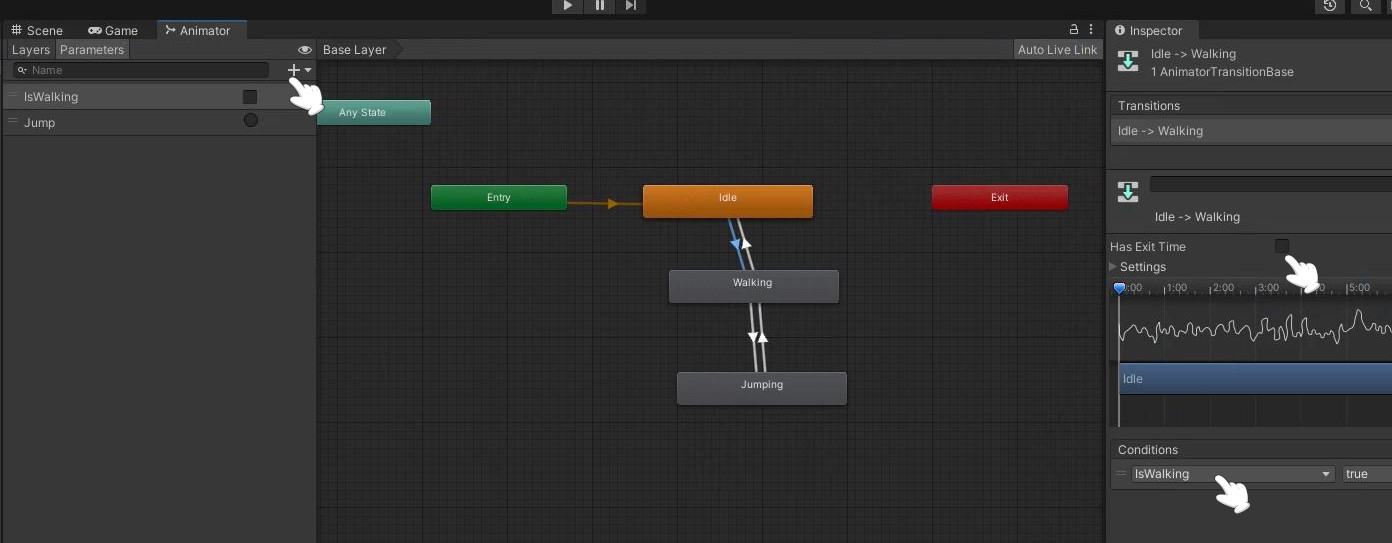
_animator.SetBool("IsWalking", true);
// It sets the value of the Animation Controller's "IsWalking" parameter as true, switches from the Idle to the Walking state, and triggers the Walking animation.
// Please notice that the Walking Animation will always be active in loop from now on.
}
}
else if (Mathf.Abs(_verticalInput) > 0.001f) {
// If the user presses the up or down arrows or "w" or "s", it sets the value of the Animation Controller's "IsWalking" parameter as false, switches from the Walking to the Idle state, and triggers the Idle animation.
// We could have checked if the attribute _IsWalking is True, but it is not necessary.
_IsWalking = false;
_animator.SetBool("IsWalking", false);
}
}
Credits: This article is inspired by How to animate and move a simple player with Mixamo and Unity/C#

JustToThePoint Copyright © 2011 - 2024 Anawim. ALL RIGHTS RESERVED. Bilingual e-books, articles, and videos to help your child and your entire family succeed, develop a healthy lifestyle, and have a lot of fun. Social Issues, Join us.
This website uses cookies to improve your navigation experience.
By continuing, you are consenting to our use of cookies, in accordance with our Cookies Policy and Website Terms and Conditions of use.