|
 |
 |
|
 |
|
|
|
|
|
|
Privacy is one of the biggest problems in this new electronic age, Andy Grove
Privacy is an inherent human right, and a requirement for maintaining the human condition with dignity and respect, Bruce Schneier
Hell is empty and all the devils are here, William Shakespeare.
We are living in difficult and distressing times, there is no doubt about it. Privacy is both a human right and a necessity, and big companies, tech titans, governments, small companies, and hackers are constantly attacking and diminishing our privacy. The loss of privacy has a corrosive and perversive effect on all of us, both as individuals and society as a whole.
For Orwell, Huxley, Bradbury, Atwood and many others, it was one of the establishing nightmares of the totalitarian future. It is the regression towards an uncivilized society, devoid of freedom and where there is a widespread use by the ruling elite of the threat of aggression as a means of controlling the masses and ensuring compliance.

How to browse anonymously: Whonix
You deserve and need to have privacy oline. This is a follow-up article to two previous articles about how to browse anonymously with Tor and Tails. It is very important to take back control of your data, be safe online, and improve your privacy and security on the Internet. Regain your digital privacy.
Whonix is a Kicksecure-based security hardened Linux distribution and it is not amnesic by default. It is designed to preserve privacy and anonymity by helping users run applications anonymously.
Tails, aka the Amnesic Incognito Live System, is a stateless operating system focused on privacy, i.e., a live OS with optional persistence that can be installed and run from a USB flash drive. On the other side, Whonix can be installed on Windows (it is not recommended), macOS, Linux and Qubes, and you can use it right alongside your operating system and applications. Both of them redirect all your traffic through the Tor network.
Basically, Whonix is more convenient than Tails because you do not need to restart your computer to use it, but vulnerabilities and malware within the host operating system can compromise your anonymity.
Xfce is a easy to use and ready to go lightweight desktop environment.


VirtualBox is a powerful, feature-rich, high performing virtualization product. It is freely available as Open Source Software under the terms of the GNU General Public License (GPL) version 2. However, it’s an Oracle product, so many people have raised serious concerns about it.
Kernel-based Virtual Machine (KVM) is a free and open-source virtualization module in the Linux kernel that allows the kernel to function as a hypervisor, i.e., a type of software that creates and runs virtual machines.
To check the hardware virtualization support, open a terminal, and type in the following command:
sudo lscpu | grep Virtualization
Virtualization:                  VT-x # You should see VT-x for Intel processors or AMD-v for AMD processors.
Let’s install KVM in Arch. We need to install some packages needed to run KVM:
sudo pacman -Syy # Update our system.
sudo reboot
sudo pacman -S archlinux-keyring # The archlinux-keyring package contains the latest keys.
sudo pacman -Syu qemu libvirt virt-manager qemu-arch-extra dnsmasq
qmeu is a generic and open source machine emulator and virtualizer. virt-manager is a GUI free software virtualization solution for GNU/Linux. libvirt is an open-source API for managing platform virtualization. It is used to manage KVM, QEMU, Xen, etc. dnsmasq is a lightweight DNS, TFTP and DHCP server.
Start and enable the libvirtd service by using the following command: sudo systemctl enable libvirtd Then, check the libvirtd service status: sudo systemctl status libvirtd
Allow a regular (non-root) user to use KVM/QEMU Virtualization:
    sudo vim /etc/libvirt/libvirtd.conf
        [...]
        # This is restricted to 'root' by default.
        unix_sock_group = "libvirt"
        [...]
        unix_sock_rw_perms = "0770"


    sudo usermod -a -G libvirt "$(whoami)" # Add your user to the libvirt and kvm groups.
    sudo usermod -a -G kvm "$(whoami)"

    sudo systemctl restart libvirtd # Finally, we reboot the system or restart the libvirt service.
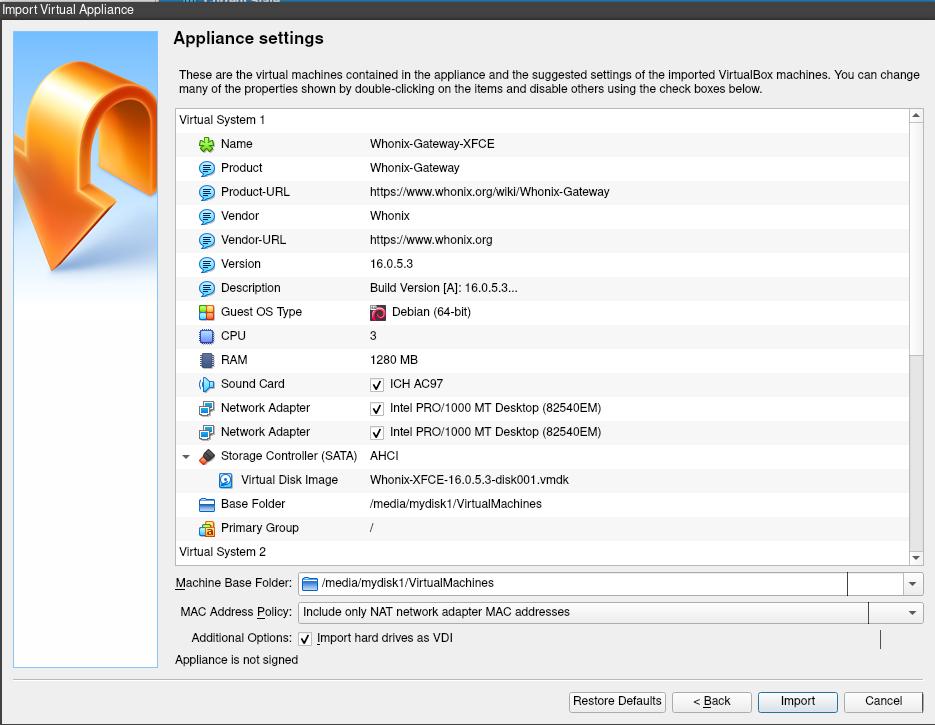
Go to Whonix, Download, Whonix for KVM, click on Download Whonix Xfce.
Decompress it: tar -xvf Whonix-XFCE-[…].xz
Importing Whonix VM Templates (Credits: Whonix Documentation)
sudo virsh -c qemu:///system net-define Whonix_external*.xml # 1. Add the virtual networks.
sudo virsh -c qemu:///system net-define Whonix_internal*.xml

sudo virsh -c qemu:///system net-autostart Whonix-External # 2. Activate the virtual networks.
sudo virsh -c qemu:///system net-start Whonix-External
sudo virsh -c qemu:///system net-autostart Whonix-Internal
sudo virsh -c qemu:///system net-start Whonix-Internal

sudo virsh -c qemu:///system define Whonix-Gateway*.xml # 3. Import the Whonix Gateway and Workstation images.
sudo virsh -c qemu:///system define Whonix-Workstation*.xml

sudo mv Whonix-Gateway*.qcow2 /var/lib/libvirt/images/Whonix-Gateway.qcow2 # 4. Both images are configured so that their virtual disk images are located in /var/lib/libvirt/images.
sudo mv Whonix-Workstation*.qcow2 /var/lib/libvirt/images/Whonix-Workstation.qcow2
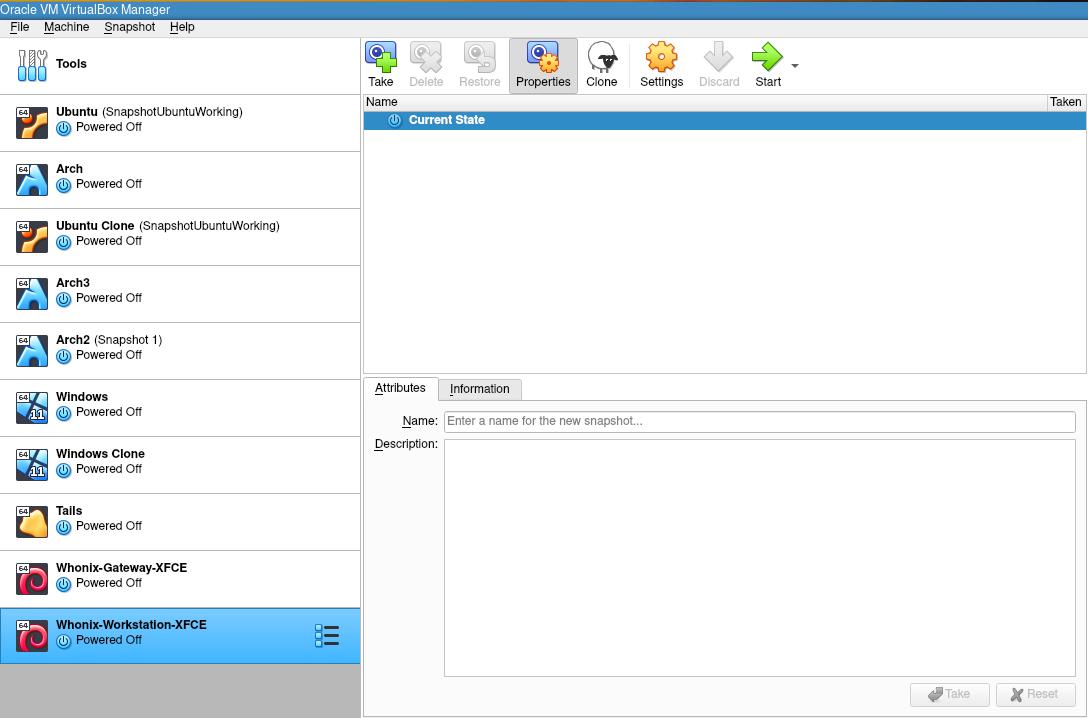
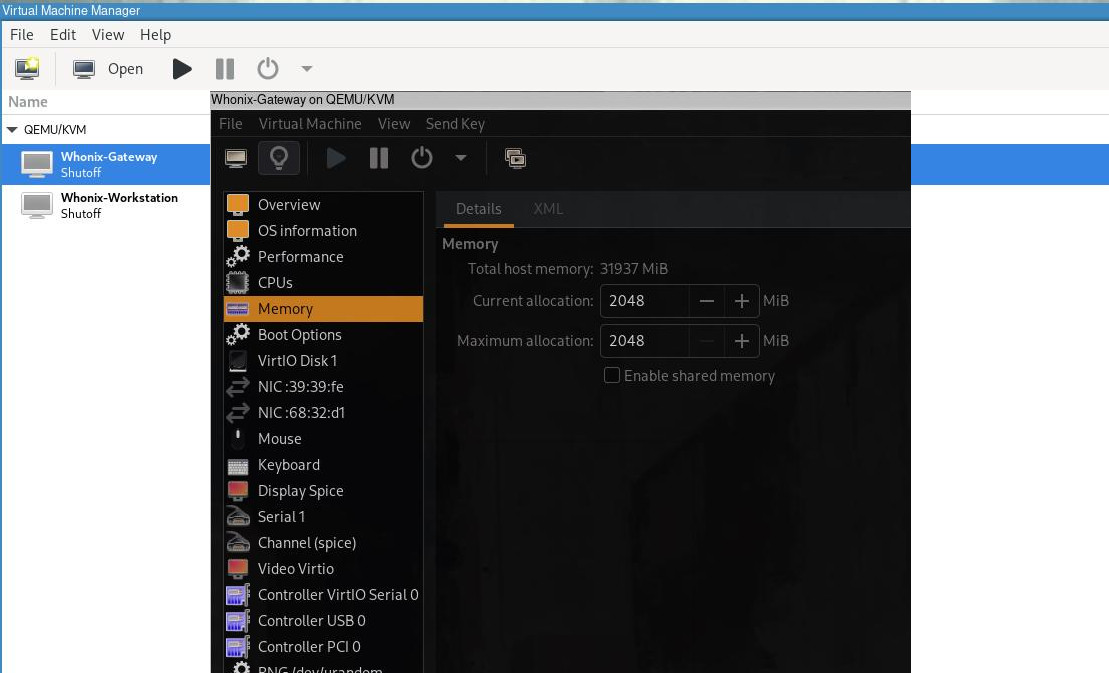
Start virt-manager. To be able to start the Xfce desktop environment, we need to give our virtual machines at least 1GB of RAM. From the list, choose one of the VM instances. Select Edit, Virtual Machine Details. Then View, Details, CPUs (e.g., 1, 2, 4); Memory (e.g., 1024, 2048, 16384).
Whonix
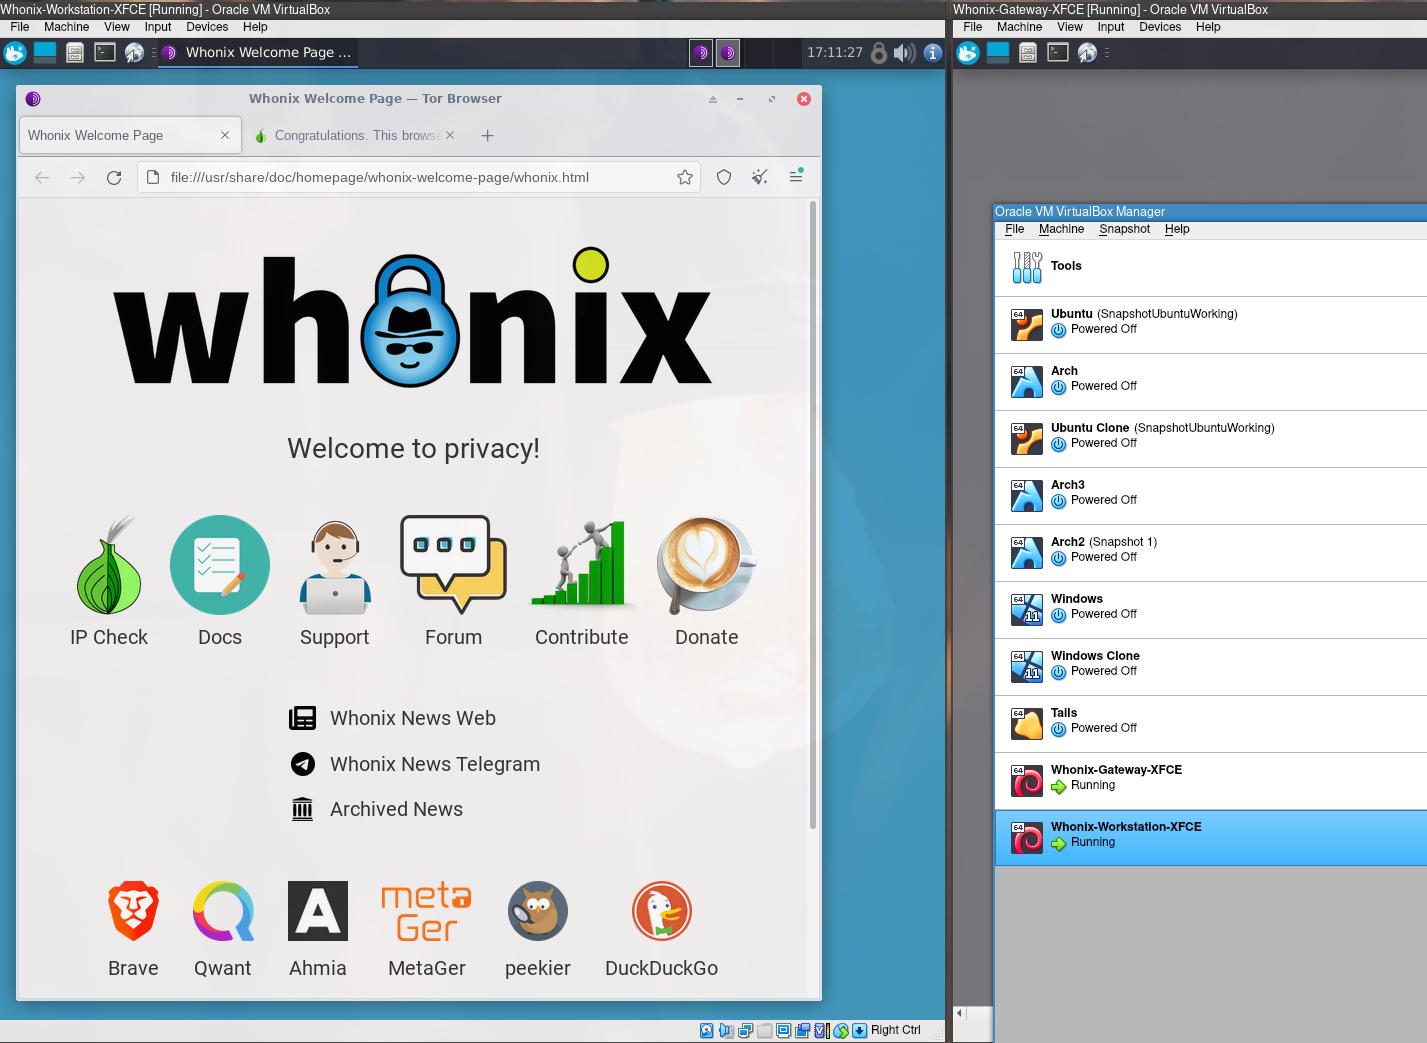
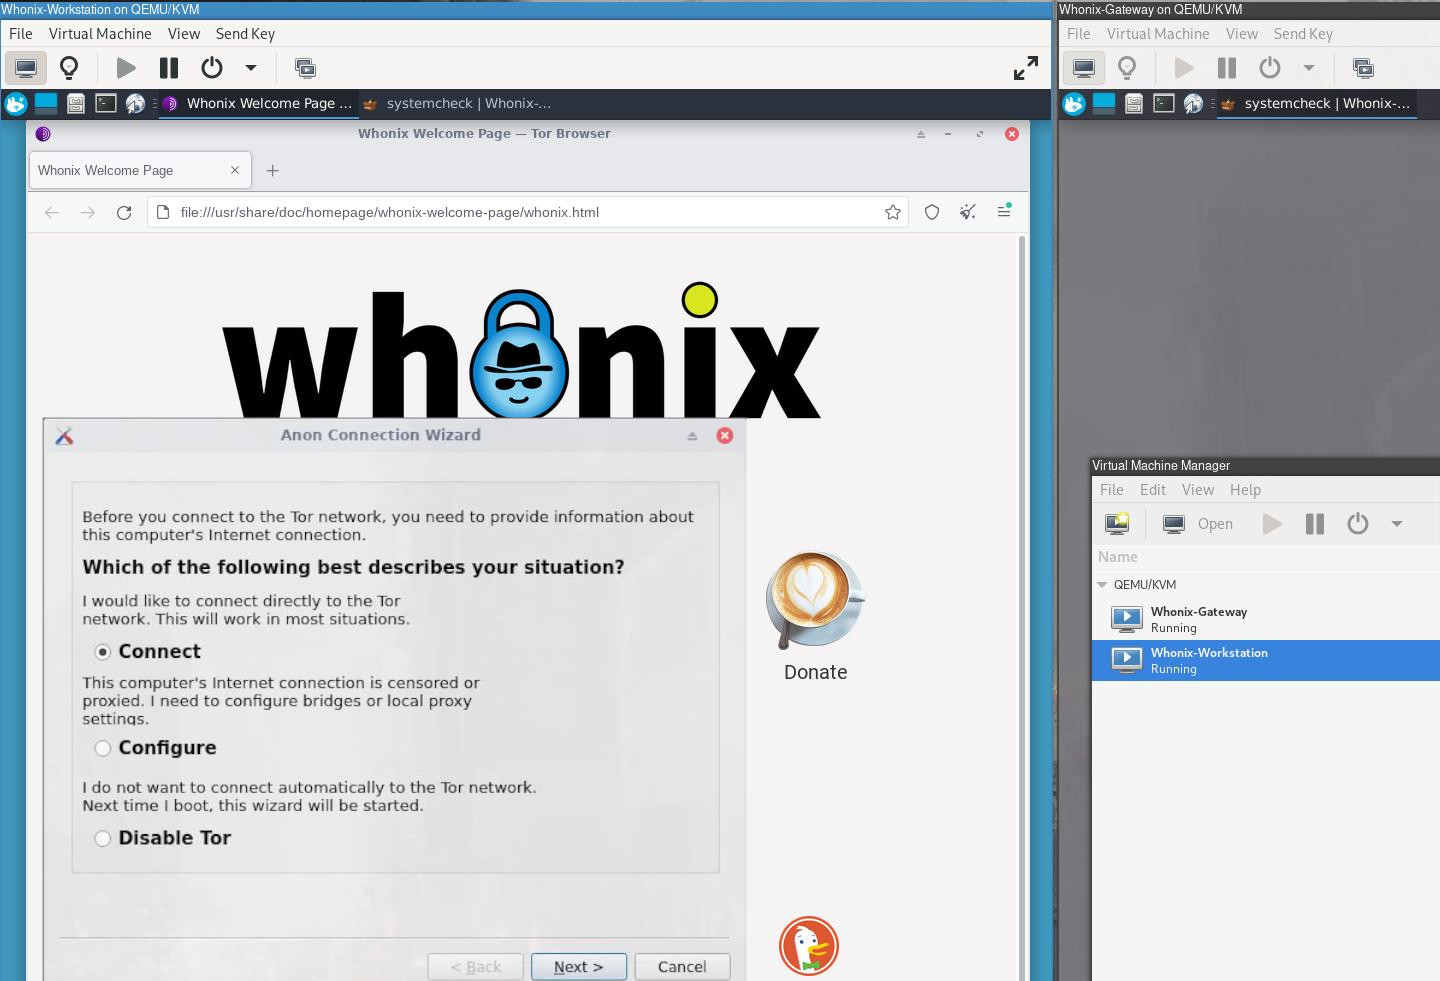
Next, we start the Whonix-Gateway virtual machine, then the Whonix-Workstation VM. There are two options to connect to the Tor network: Connect (to Tor automatically), this is the easiest and fastest option. It uses a public relay as your first Tor relay, and by doing so, it makes it clear to your local network that you are connecting to Tor, while still keeping your online activity secure and anonymous. If connecting to Tor is blocked in your country or looks suspicious to someone who monitors your Internet connection, use the second option, Configure. It uses tor bridges, i.e., secret Tor relays that keep your connection to the Tor network hidden.
Whonix
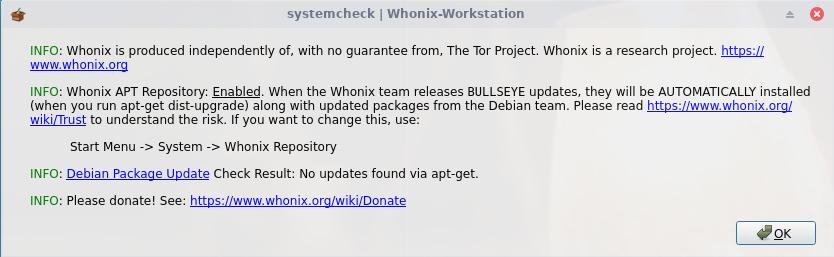
Run systemcheck, open a terminal and type whonixcheck or navigate through Start Menu, System, System Check to verify that the Kicksecure system is up-to-date and that everything is in proper working order. You may also want to update the VM: upgrade-nonroot
Whonix

JustToThePoint Copyright © 2011 - 2024 Anawim. ALL RIGHTS RESERVED. Bilingual e-books, articles, and videos to help your child and your entire family succeed, develop a healthy lifestyle, and have a lot of fun. Social Issues, Join us.
This website uses cookies to improve your navigation experience.
By continuing, you are consenting to our use of cookies, in accordance with our Cookies Policy and Website Terms and Conditions of use.