How to use Clonezilla and Rescuezilla to clone or create/restore an image.
Clonezilla is a free and open source partition and disk imaging/cloning program similar to True Image® or Norton Ghost®. We are going to use it to clone our main hard drive. You need a Usb Flash drive and a second drive with an equal or larger capacity than your main hard drive.
Clonezilla
How to use Clonezilla to clone your hard drives
First, you need to download a copy of Clonezilla. Launch your favorite browser, go to the Clonezilla donwload page, switch Select file type: to iso, and smash the Download button.
Now you need to reboot your system, go into boot selection mode (F12), and select your Clonezilla USB flash drive.
If you are using VirtualBox for learning and testing, go to Settings, System, and uncheck “Enable EFI”.
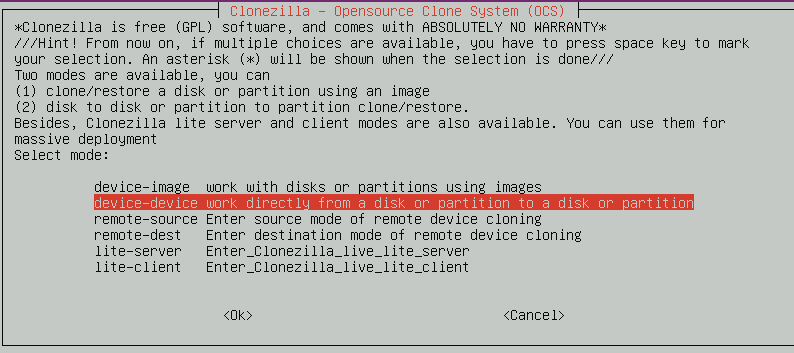
Once Clonezilla boots, select Clonezilla live (Default Settings, VGA 800x600); then choose your language, en_US.UTF-8 English and keep the default keyboard layout - US keyboard, Start_Clonezilla Start Clonezilla, and device-device work directly from a disk or partition to a disk or partition because we are going to clone or copy from a disk to a second disk.
How to use Clonezilla to clone your hard drives
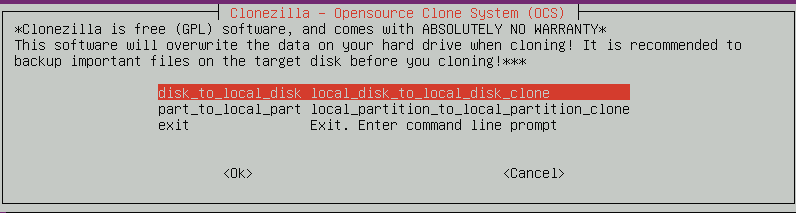
Choose the mode to run the following wizard? Select Beginner. Next, select disc_to_local_disc because we want to clone the current main hard disk to another local disk (e.g., the second hard disk). The second option, part to local part, allows you to clone or make a copy of a local partition to another local partition.
How to use Clonezilla to clone your hard drives
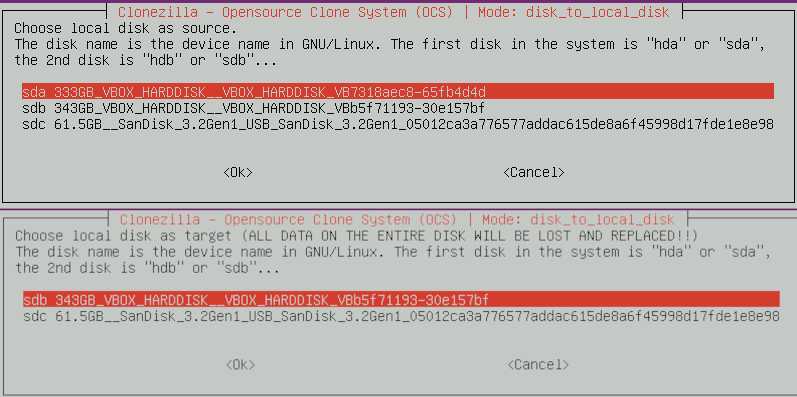
Next, we tell Clonezilla which disk should clone, a local drive as source, e.g., sda, your first hard drive, and the storage you want to copy to, a local drive as target, e.g. sdb, your second hard drive, sdc is the USB flash drive.
How to use Clonezilla to clone your hard drives
Set the advanced parameters. If you have no idea, keep the default value and do not change anything (self-explanatory): Skip checking/repairing source file system.
Decide the action to perform when everything is finished, select choose, reboot or poweroff, it does not make any difference whatsoever anyway.
How to use Clonezilla to create an image
We are going to create a copy of our entire disk in a single file that is called an “image”.
The process is quite the same till this very step, select device-image because we are going to work with disks or partitions using images.
How to use Clonezilla to create an image
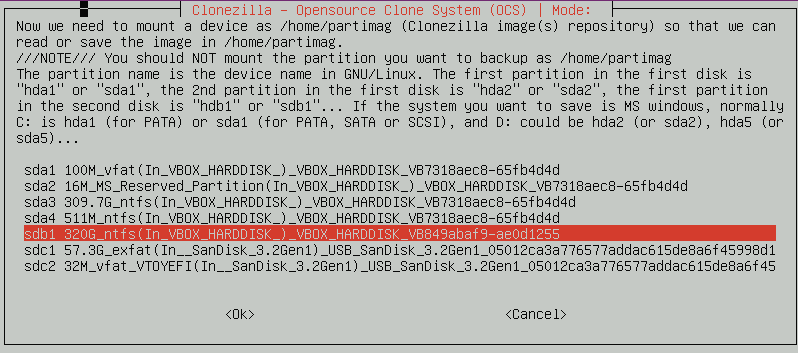
Next, we are going to tell Clonezilla where we want to save the image. We want to save the image locally, so we are going to select local_dev. Next, we select the partition where our image will be stored, e.g., sdb1.
How to use Clonezilla to create an image
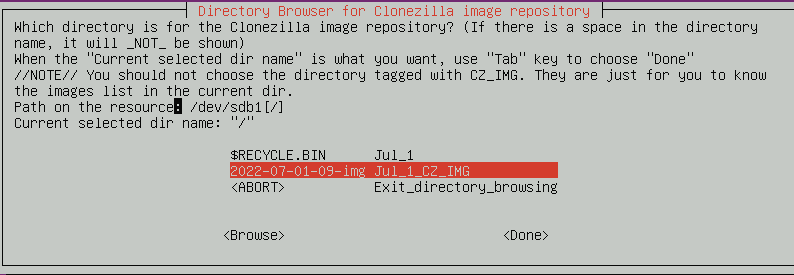
Choose if you want to check and repair the file system before mounting the image repository […]. Select Skip checking/repairing the file system before mounting. Browse and select a directory in the previous selected partition.
Choose the mode to run the following wizard about advanced parameters. Select Beginner.
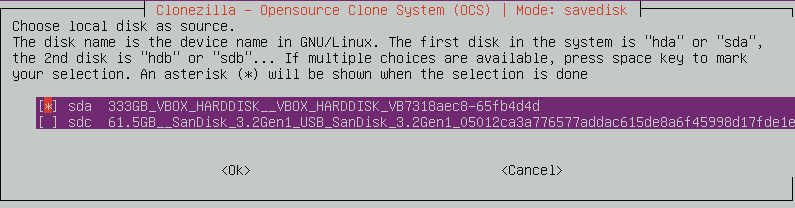
Clonezilla: Select mode. Select savedisk, save local disk as an image to save an image of the whole local drive.
Clonezilla: Mode savedisk. Give a name for your image.
Select the local disk you want to save and create an image, e.g., sda.
How to use Clonezilla to create an image
Choose the compression option. Select -zip Use parallel gzip compression, for multicore/CPU. Then, you can choose if you want to check and repair the file system before saving it. Select Skip checking/repairing source file system. After the image is saved, do you want to check if the image is restorable? Select Yes, check the saved image.
It is generally a very good idea to go with the default settings.
Do you want to encrypt the image? Select Not to encrypt the image. Finally, choose which action to take when everything is finished, e.g., poweroff Shutdown the computer. Are you sure you want to continue? Press y to start saving your disk to an image.
How to use Clonezilla to restore an image
The process is quite similar to creating a image. Of course you need to boot up your computer from the Clonezilla live USB, choose your language, keyboard layout, and select device-image because we are going to work with disks or partitions using images.
How to use Clonezilla to restore an image
Before cloning, you have to assign where the Clonezilla image will be saved to or read from? Let’s select Use local device, but you have many options: SSH server, SAMBA server, or NFS serves.
We need to select where the image is, e.g., sdb1.
How to use Clonezilla to restore an image
Choose if you want to check and repair the file system before mounting the image repository […]. Select Skip checking/repairing the file system before mounting. Next, select which directory the image is.
How to use Clonezilla to restore an image
Choose the mode to run the following wizard about advanced parameters. Select Beginner.
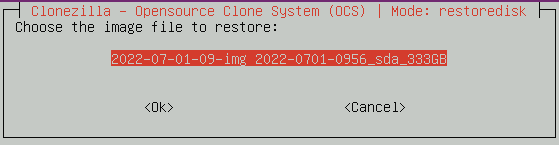
Clonezilla: Select mode. Select restoredisk, restore_an_image_to_local_disk to restore the image to our local drive, and choose the image file to restore. There is only one image file in our image directory.
How to use Clonezilla to restore an image
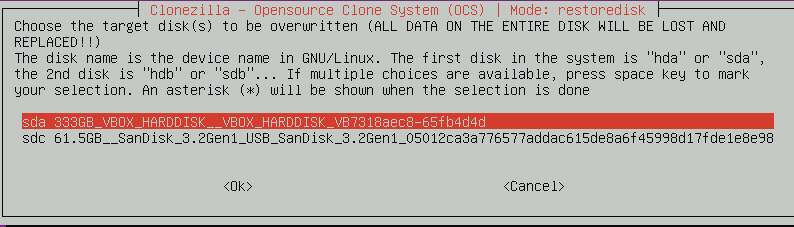
Choose the target disk to be overwritten, the disk where our image will be restored, e.g., sda.
How to use Clonezilla to restore an image
Before restoring the image, do you want to check if the image is restorable or not? Select Yes, check the image before restoring
It is generally a very good idea to go with the default settings.
Finally, choose which action to take when everything is finished, e.g., poweroff Shutdown the computer. Are you sure you want to continue? Press y to start restoring your image to a disk.
Recuezilla
Rescuezilla is an open-source easy-to-use disk imaging app that’s fully compatible with Clonezilla.
First, you need to download a copy of Rescuezilla. Launch your favorite browser, go to their website and smash the Download button.
Now you need to reboot your system, go into boot selection mode (F12 or F8), and select your Rescuezilla USB flash drive, then Boot in normal mode, then you may need to select Graphical fallback mode instead of Start Rescuezilla.
If you are using VirtualBox for learning and testing, go to Settings, System, and uncheck “Enable EFI”.
Click on the Backup button, then there is a step by step wizard to create a backup of your system.
Step 3. Select Destination Drive to save your backup. Typically, you will select Connected directly to my computer, but you can also save your backups over your network. Typically, you will backup locally and select the partition where the image files will be saved to, e.g., an external hard disk, #1 2.7TB Drive 2, Partition 1: 2.7TB ext4.
Step 6. Customize Compression Settings. Click on the drop-down to select the compression format (e.g., gzip(default)) and move the slider to select the compression level. Default options are usually OK.
Step 7. Confirm Backup Configuration is self-explanatory, but be sure to double check if you have selected the right hard disks and partitions to create and save the backup.
Of course, Rescuezilla allows you to restore your backup in quite a similar fashion, verify the integrity of the backup, and comes with some utilities such as GParted.
This website uses cookies to improve your navigation experience. By continuing, you are consenting to our use of cookies, in accordance with our Cookies Policy and Website Terms and Conditions of use.