|
 |
 |
|
 |
|
|
|
|
|
|
A bootable USB is a regular USB storage device that has an ISO image of an operating system saved on it. It is very useful because you can boot up your computer using the USB’s iso image andclone or restore a hard drive, repair a broken system, scan for virus, perform diagnostics, or install an operating system on your computer.
To create a bootable USB, all you need is: an ISO (e.g., Windows 11, Ubuntu, Clonezilla, etc.), a tool to create bootable USBs from an ISO image (Rufus, Unetbootin, BalenaEtcher, YUMI, or Ventoy), and a spare USB stick. You must have a USB flash drive with at least 8 GB of space, but 16 GB, 32 GB or more, and USB 3 is preferable.
 :
:
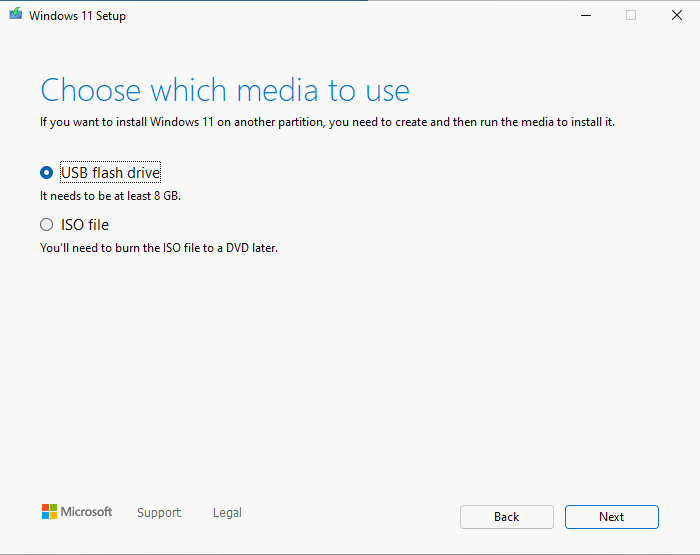
Windows Installation Media is the media creation tool to create a bootable USB or DVD for installing Windows. After accepting the license terms, the tool will suggest a language (e.g., English) and edition (e.g., Windows 11) for Windows based on information about your PC. 
Then, select whether you want to create a bootable USB flash drive or an ISO file. If you have chosen the ISO file option, then you need to select a place to save the ISO file. After that, the Media Creation Tool will start downloading Windows and assembling your ISO. It will take some time, so be patience. When it is finished, you could burn the iso file to a CD or DVD, perform a clean installation of Windows, create a virtual machine, or just save it for later use.
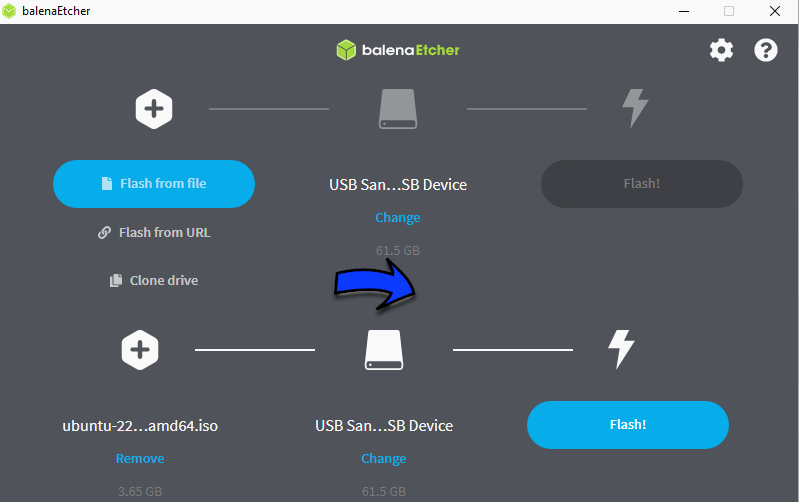
balenaEtcher is an open-source software to create a bootable USB drive using ISO files safely and easily.
 An alternative is Rufus. It is a utility that helps format and create bootable USB flash drives, such as USB keys/pendrives, memory sticks, etc.
Ventoy is an open source tool to create multiboot USB drives. It is great for installing multiple bootable operating systems on the same USB drive.
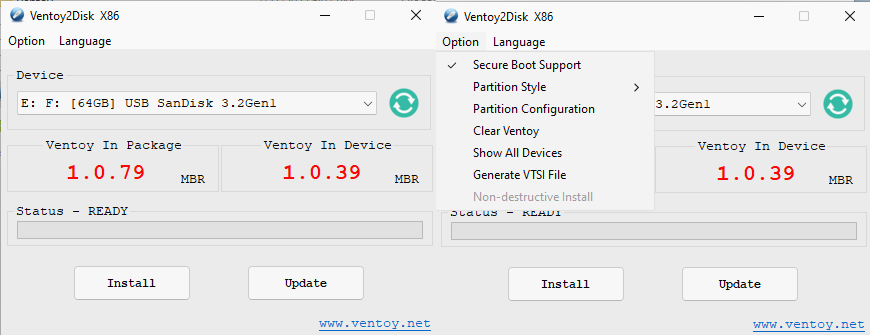
If you are a Windows user, open your favorite browser, go to Ventoy’s Github page, download it, and unzip the downloaded file. Run the Ventoy2Disk.exe executable file inside the unzipped folder.
Under the Device dropdown menu, select your USB drive where you want to install your multiboot USB.
Click on the Option menu and ensure that Secure Boot Support is enabled (It is one of the requirements for installing Windows 11) and smash the Install button.
Open File Explorer and copy your ISOs to your USB’s drive.
To launch the Ventoy multiboot USB drive, plug your USB drive into your PC, turn it on, enter the boot menu by pressing the F12 key, and choose the USB drive, then the OS you want to boot from.
If you are a GNU/Linux user, download the installation package and decompress it. Run the following shell script as root: sudo sh Ventoy2Disk.sh -i /dev/sdX
Note that /dev/sdX has to be changed to your USB drive. Check it with the following command: sudo parted -l (it lists all your partitions).
That’s it! You just need to copy your .iso images to the USB.
Some useful ISOs: Windows PE (WinPE) is a small operating system used to install, deploy, and repair Windows. Tails (a portable operating system that protects against surveillance and censorship), GParted (a free partition editor for graphically managing your disk partitions), Clonezilla (a free partition and disk imaging/cloning program), Ubuntu, and Garuda Linux.
Configure the persistent USB drive: sudo ./CreatePersistentImg.sh. It creates a file (persistence.dat) inside the ventoy folder. Next, copy it to your USB drive. Now create a folder called “ventoy” in your USB drive. And then create a configuration file (“ventoy.json”) inside this recently created ventoy folder. vi ventoy.json:
{
  "persistence" :
  [
    {
      "image": "/myFavouriteDistro.iso",
      "backend": "/persistence.dat"
    },
    {
      "image": "/myFavouriteDistro2.iso",
      "backend": "/persistence2.dat"
    }
  ]
}
A persistent Live USB allows its users to save data changes (e.g., installed programs, settings, documents, etc.) back to the USB device instead of leaving (and therefore, losing) the information in the RAM.
You may also want to create a few directories: ISOs (and copy all your ISO files into this one), persistence (persistence.dat, persistence2.dat, etc.), and PortableApps to be organized.
PortableApps is a very popular portable software solution allowing you to take your favorite Windows software with you.

JustToThePoint Copyright © 2011 - 2024 Anawim. ALL RIGHTS RESERVED. Bilingual e-books, articles, and videos to help your child and your entire family succeed, develop a healthy lifestyle, and have a lot of fun. Social Issues, Join us.
This website uses cookies to improve your navigation experience.
By continuing, you are consenting to our use of cookies, in accordance with our Cookies Policy and Website Terms and Conditions of use.