|
 |
 |
|
 |
|
|
|
|
|
|
Pillow is the defacto Python image processing library. To install it, just type the following command in the terminal: python -m pip install pillow. Let’s display, rotate, resize, and flip images.
from PIL import Image
def rotateMirrorImage(imagen):
im = Image.open(imagen)
To load an image from a file, we use the open function in the Image module. It returns an Image object. Once you have an instance of the Image class, you can use the methods defined by this class to display, process, and manipulate the image.
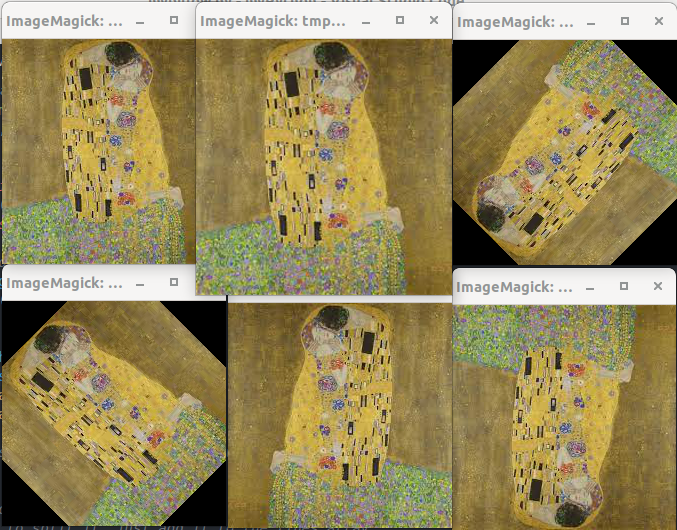
im.show() # It displays the image we just loaded
im.resize((256, 256)).show() # The Image class contains methods to resize and...
im.rotate(45).show() # rotate an image. Its argument is the angle in degrees counter-clockwise.
im.rotate(135).show()
im.transpose(Image.FLIP_LEFT_RIGHT).show() # The transpose method can be used to fill an image horizontally and ...
im.transpose(Image.FLIP_TOP_BOTTOM).show() # vertically
if __name__ == "__main__":
rotateMirrorImage("kiss.jpeg")
Next, we will apply some filters, invert images, and convert images to grayscale mode.
from PIL import Image, ImageFilter, ImageOps
def filterImage(imagen, filter):
im = Image.open(imagen)
out = im.filter(filter) # The ImageFilter class provides several standard image filters: ImageFilter.BLUR, ImageFilter.SHARPEN, ImageFilter.GaussianBlur(radius = 2), etc.
out.show()
def invertImage(imagen):
im = Image.open(imagen)
out = ImageOps.invert(im) # It inverts the colors of the image using the invert() method in the ImageOps module.
out.show()
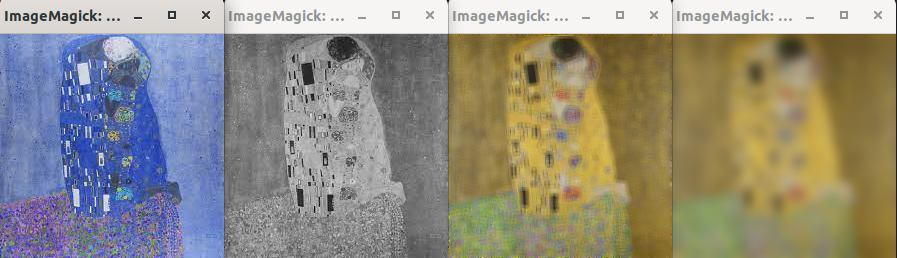
def grayscale(image):
im = Image.open(image)
im.convert("L").show() # Image.convert(mode) returns a converted copy of the image. The current version supports all possible conversions between "L" (greyscale), "RGB", and "CMYK".
if __name__ == "__main__":
invertImage("kiss.jpeg")
grayscale("kiss.jpeg")
filterImage("kiss.jpeg", ImageFilter.BLUR)
filterImage("kiss.jpeg", ImageFilter.GaussianBlur(5))
Get information from an image:
from PIL import Image, ImageFilter, ImageOps
def informationImage(imagen):
im = Image.open(imagen)
print("Filename: ", im.filename, ". Size: ", im.size)
Getting basic information from an image is quite easy. We use the attributes of the Image class: filename (filename or path of the source file), size (image size, in pixels), palette (colour palette table, if any), and mode (Image mode. Typical values are “1”, “L”, “RGB”, or “CMYK”).
print("File Format: ", im.format, ". Colour Palette: ", im.mode)
if __name__ == "__main__":
informationImage("kiss.jpeg")
Filename: kiss.jpeg . Size: (224, 225)
File Format: JPEG . Colour Palette: RGB
from PIL import Image, ImageFilter, ImageOps
def convertJPEG(imageOriginal):
im = Image.open(imageOriginal)
imageDestino = im.filename.split('.')[0] + ".jpeg" # It gets the image filename (im.filename.split('.')[0]) and adds its extension .jpeg.
im.convert('RGB').save(imageDestino, 'jpeg') # It is a two step process: A) Convert the image into RGB. B) Save the image as a JPEG file.
if __name__ == "__main__":
convertJPEG("myPicture.png")
from PIL import Image, ImageFilter, ImageOps
def thumbnail(imageOriginal):
im = Image.open(imageOriginal)
imageDestino = im.filename.split('.')[0] + "_thumb." + im.filename.split('.')[1] # It gets the image filename (im.filename.split('.')[0]) and adds "_thumb." and the image extension (im.filename.split('.')[1] )
im.thumbnail((90, 90)) # It create a nice thumbnail in the current directory.
im.save(imageDestino)
if __name__ == "__main__":
thumbnail("kiss.jpeg")
from PIL import Image, ImageDraw, ImageFont
def watermark(image):
im = Image.open(image)
width, height = im.size
draw = ImageDraw.Draw(im) # It gets a drawing context.
font = ImageFont.truetype('DejaVuSans.ttf', 18) # To load a font, we use the truetype function in the ImageFont module.
text = "JustToThePoint"
textwidth, textheight = draw.textsize(text, font) # It returns the size of the given string.
margin = 7
x = (width - textwidth - margin)/2 # (x, y) are the coordinates of the text
y = height/2
draw.text((x, y), text, font=font, fill=(255,255,255,128)) # Draw a watermark in the center, half opacity.
imageDestino = im.filename.split('.')[0] + "_water." + im.filename.split('.')[1] # It gets the image filename (im.filename.split('.')[0]) and adds "_water." and the image extension (im.filename.split('.')[1] )
im.save(imageDestino)
if __name__ == "__main__":
watermark("kiss.jpeg")

JustToThePoint Copyright © 2011 - 2024 Anawim. ALL RIGHTS RESERVED. Bilingual e-books, articles, and videos to help your child and your entire family succeed, develop a healthy lifestyle, and have a lot of fun. Social Issues, Join us.
This website uses cookies to improve your navigation experience.
By continuing, you are consenting to our use of cookies, in accordance with our Cookies Policy and Website Terms and Conditions of use.