The government doesn’t want any system of transmitting information to remain unbroken, unless it’s under its own control, Isaac Asimov, Tales of the Black Widowers.
If you have a computer or laptop with important, private, or sensitive files, data, and information, you should encrypt your entire drive. Basically, encryption is a method of making your data unreadable, so that only authorized parties can access and read it.

VeraCrypt
VeraCrypt is a free and open-source disk encryption software for Windows, Mac OS X and Linux.
Let’s encrypt your system drive.
- Select the System menu, then Encrypt System Partition/Drive….
- You are going to be asked whether you want to user Normal or Hidden encryption. Typically, you will want to encrypt the system partition or the entire system drive normally. It involves pre-boot authentication, which means that anyone who wants to gain access and use the encrypted system, read and write files stored on the system drive, etc., will need to enter the correct password each time before Windows boots. Therefore, select Normal and continue.

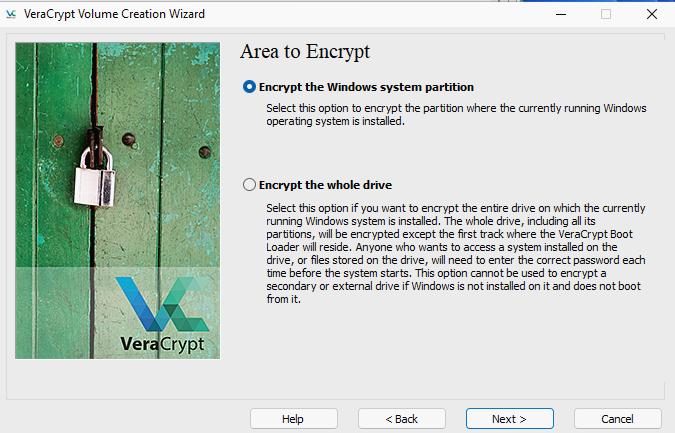
- Next, you are presented with two options: Encrypt the Windows system partition or Encrypt the whole drive. You may want to choose the latter if you want to encrypt the entire drive on which the currently running Windows system is installed because you have multiple partitions with sensitive or confidential data.
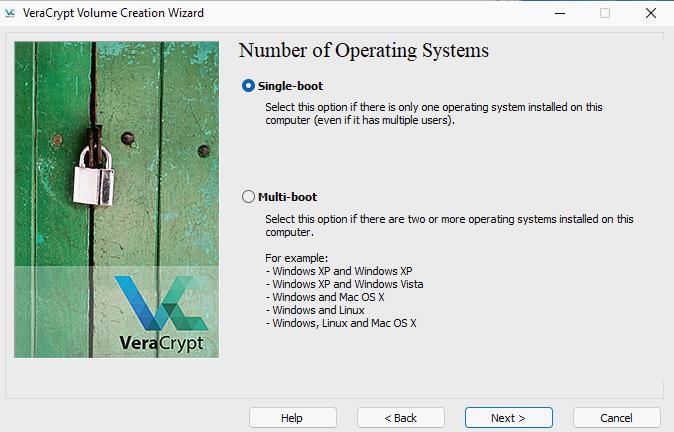
- Now, VeraCrypt will ask you how many operating systems are installed on your computer. Most people only have Windows, a single operating system, installed so they should choose the Single-boot option.
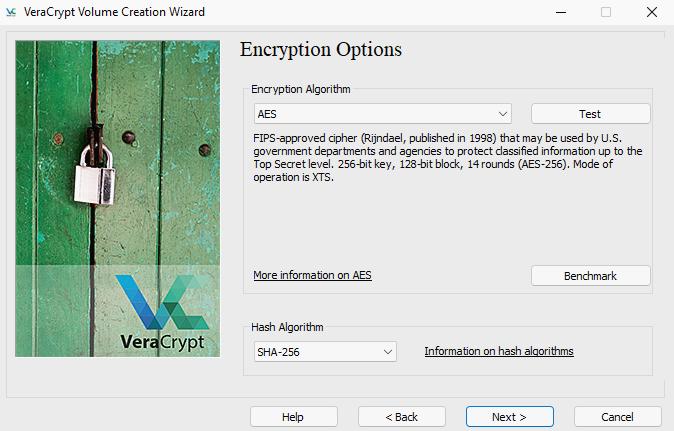
- What type of encryption you want to use? AES encryption and the SHA-256 hash algorithm are good and solid choices. Sticking to default settings is usually a good idea.
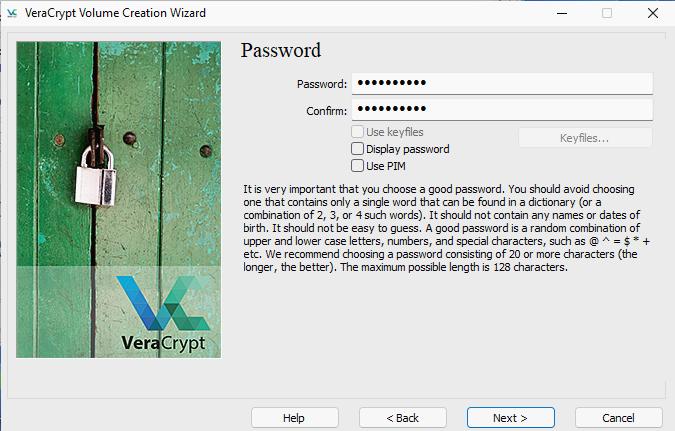
- Enter a secure private password. It should consist of 20 or more characters. It should not be easy to guess, bla, bla, bla, whatever… you already know that, don’t you?
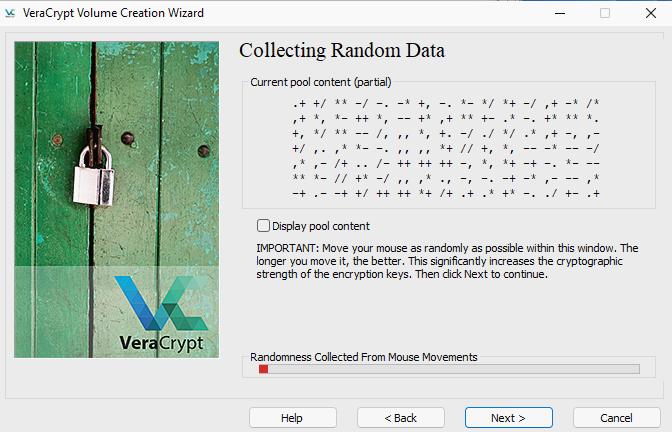
- Move the mouse as if you were tormented by an evil spirit or watching CNN… 😄 VeraCrypt uses these random mouse movements to increase the cryptographic strength of the encryption keys. When you’ve filled up the progress bar, smash the Next button.
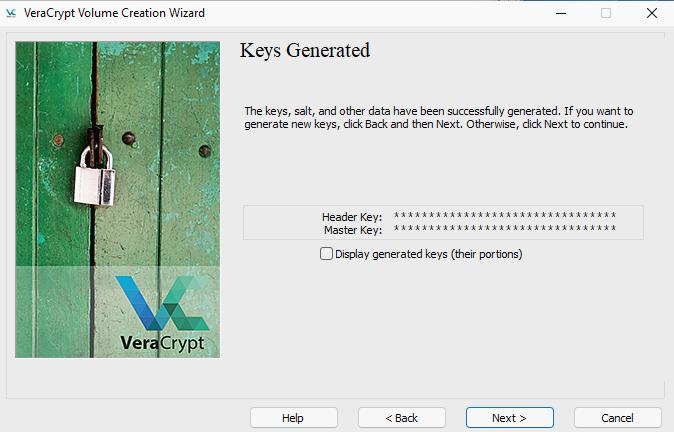
- The VeraCrypt’s wizard will inform you that the keys, salt, and other data that have been successfully generated. Click Next to continue.
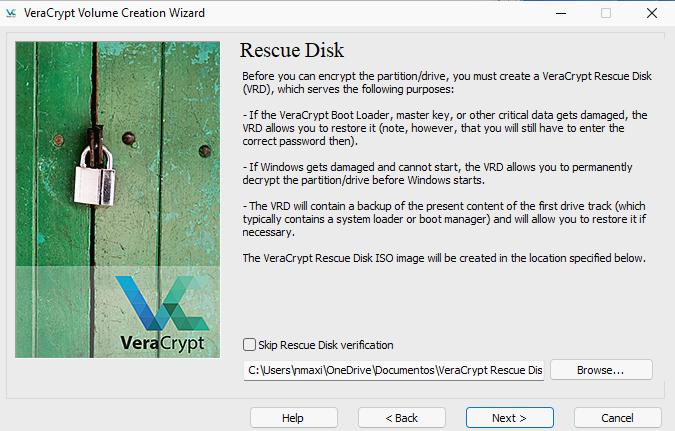
- Before you can encrypt your partition or drive, you must create a VeraCrypt Rescue Disk. Observe that VeraCrypt will create a ISO image at C:\Users\YourUser\Documentos\VeraCrypt Rescue Disk.iso.
- When data is overwritten with other data, it may be possible to recover it. If you have very sensitive data on your drive, you should select Wipe mode: 1-pass (random data), 3 pass, 7 pass, even go to the maximum level: 25 pass (Guttmann).
The Guttmann method, if applied properly, should rendered the data on the drive completely unrecoverable.
However, there is always a price to pay and a sacrifice to make, the larger the number of passes, the longer the encryption process will take, the more processing power it requires and the slower your productivity becomes.

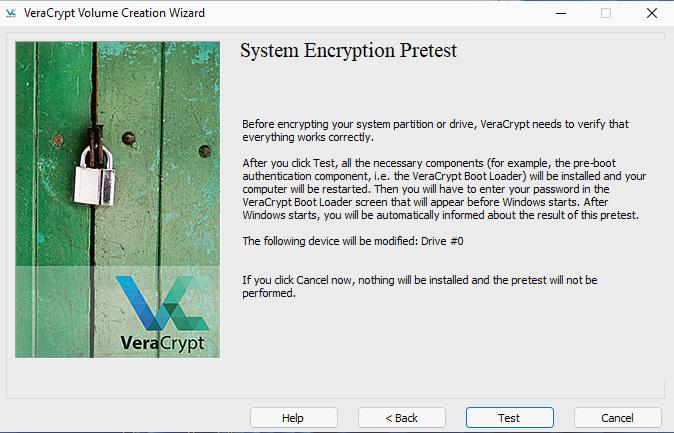
- VeraCrypt is going to verify everything is working correctly before encrypting your system partition or drive. Click Test. VeraCrypt will install its bootloader on your PC, restart, and you will be asked to enter your password.
- You will have to enter your VeraCrypt encryption password each time your PC boots. If you did not enter a custom PIM number, just press enter at the PIM prompt.
- Before you start encrypting, make sure that you have backup copies of the files and directories you want to encrypt. If the power supply is interrupted or the operating system crashes while VeraCrypt is encrypting your data, some of your files could be irreversible corrupted or lost. When you have backup copies of your files, click the Encrypt button.
- If your system is low on resources or you change your mind, and decide to remove the encryption, select the System menu and choose Permanently Decrypt System Partition/Drive. It will permanently terminate and reverse the encryption process.
Encrypt a USB Drive -the flash drive is entirely erased in the process-: Create Volumen, Encrypt a non-system partition/drive, Standard VeraCrypt volume, the assistant will ask you to …
- Volume Location. Click Select Device… and choose the USB drive you want to encrypt.
- Select Create encrypted volume and format it.
- Choose an encryption (AES) and a Hash algorithm (SHA-512).
- Volume Size: VeraCrypt shows the size of your USB drive and asks you to confirm that the size of the selected device is correct.
- Choose a secure password.
- Do you intent to store files larger than 4 GB in your USB drive? Depending on your choice, VeraCrypt will choose a suitable file system for the VeraCrypt volume: FAT only works with files up to 4GB/NTFS.
- Move your mouse as randomly as possible until the progress bar a the bottom of the VeraCrypt’s wizard fills up and click Format.
- Some warnings: Are you sure you want to proceed with format? Select Yes. WARNING: The selected partition contains a large amount of data! Any files stored on the partition will be erased and lost (they will not be encrypted). Select Erase any files stored on the partition by creating a VeraCrypt volume within it.
- Volumen Created: The VeraCrypt volume has been created and is ready for use.
- After that, you will mount the volume by clicking Select Device…, choose your encrypted USB drive, select a free drive slot, then click Mount, and enter your password to unlock it.
How to Use 7-Zip to Encrypt Files and Folder
Right click on the file/folder to be encrypted. Select 7-Zip, then “Add to Archive…” Change the Encryption Method to “AES-256” and enter a password.
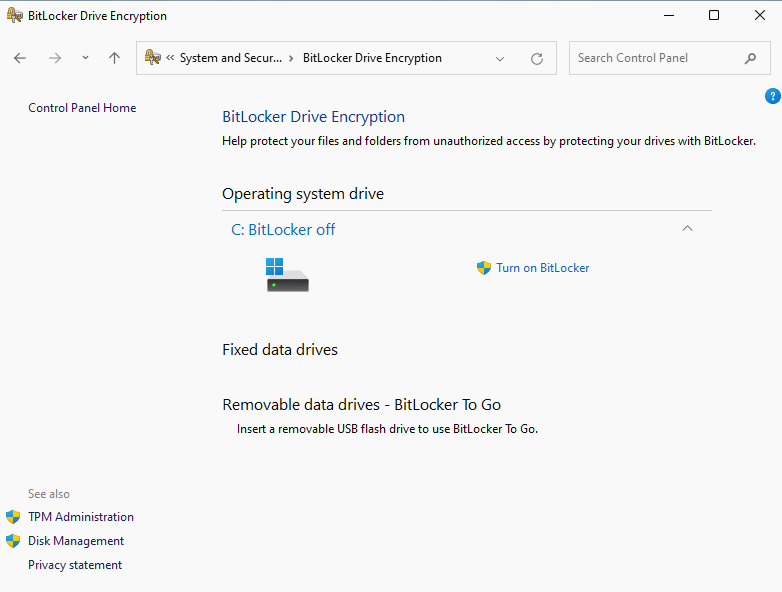
BitLocker
To enable BitLocker encryption (it is not available in Window’s home edition 😠), search for Control Panel, click on System and Security, BitLocker Drive Encryption, and smash the Turn on BitLocker option.
 Then, select how to save the recovery key: Save to your Microsoft account (it is convenient, but not safe), Save to a file, or Print the recovery. You will be prompted to choose how much of your drive you want to encrypt (Encrypt entire drive) and encryption mode (Compatible mode), click the Run BitLocker system check option and smash the Continue button.
macOS’s FireVault
FireVault is macOS build-in disk encryption feature. It encrypts and decrypts files associated with your profile on the fly using a password that you set.
Go to System Preferences, Security & Privacy, and choose the FileVault tab. Click the lock at the left bottom, enter your password, and click Turn on FileVault… to enable this feature.
Select Allow my iCloud account to unlock my disk (it is a convenient way to protect your local files on your mac) or Create a recovery key and do not use my iCloud account (if there is very sensitive information on your Mac, this is your safest bet). Finally, save the recovery key in a secure location (e.g., KeePassXC).


